
Appearance
Build your first game interface
Follow this visual route to add a main menu, HUD, custom Blueprint entry, pause screen and settings to your own game. Each editor image shows a real saved asset in Unreal Engine 5.8.3. Click or keyboard-focus an image and press Enter to enlarge it. Choose Actual size · 100% and scroll to read small property names and graph pins; Escape closes the viewer.
UIForge is the product name. InterfaceForge remains the plugin/module name and IF is the class prefix. Your game owns gameplay, possession and saves. The plugin needs CommonUI/CommonInput and Enhanced Input; it does not need MassForge or an inventory plugin.
1. Find the learning assets
Install InterfaceForge in <YourGame>/Plugins/, enable it with CommonUI and Enhanced Input, and reopen/build the project with the matching engine. These instructions target the verified UE 5.8.3 / Win64 source revision. See installation for toolchain and compatibility limits.
In the Content Browser, enable Show Plugin Content from its Settings menu. Core themes live at /InterfaceForge/UIForge/Themes. The example project adds /Game/UIForgeTutorial and /Game/ForgeExamples; these folders are not a dependency of the core plugin.
Open /Game/UIForgeTutorial/Walkthrough to inspect the small Blueprint integration. Keep your existing PlayerController/GameMode when adapting an established game. For a new learning map, assign BP_TutorialGameMode in World Settings → GameMode Override.
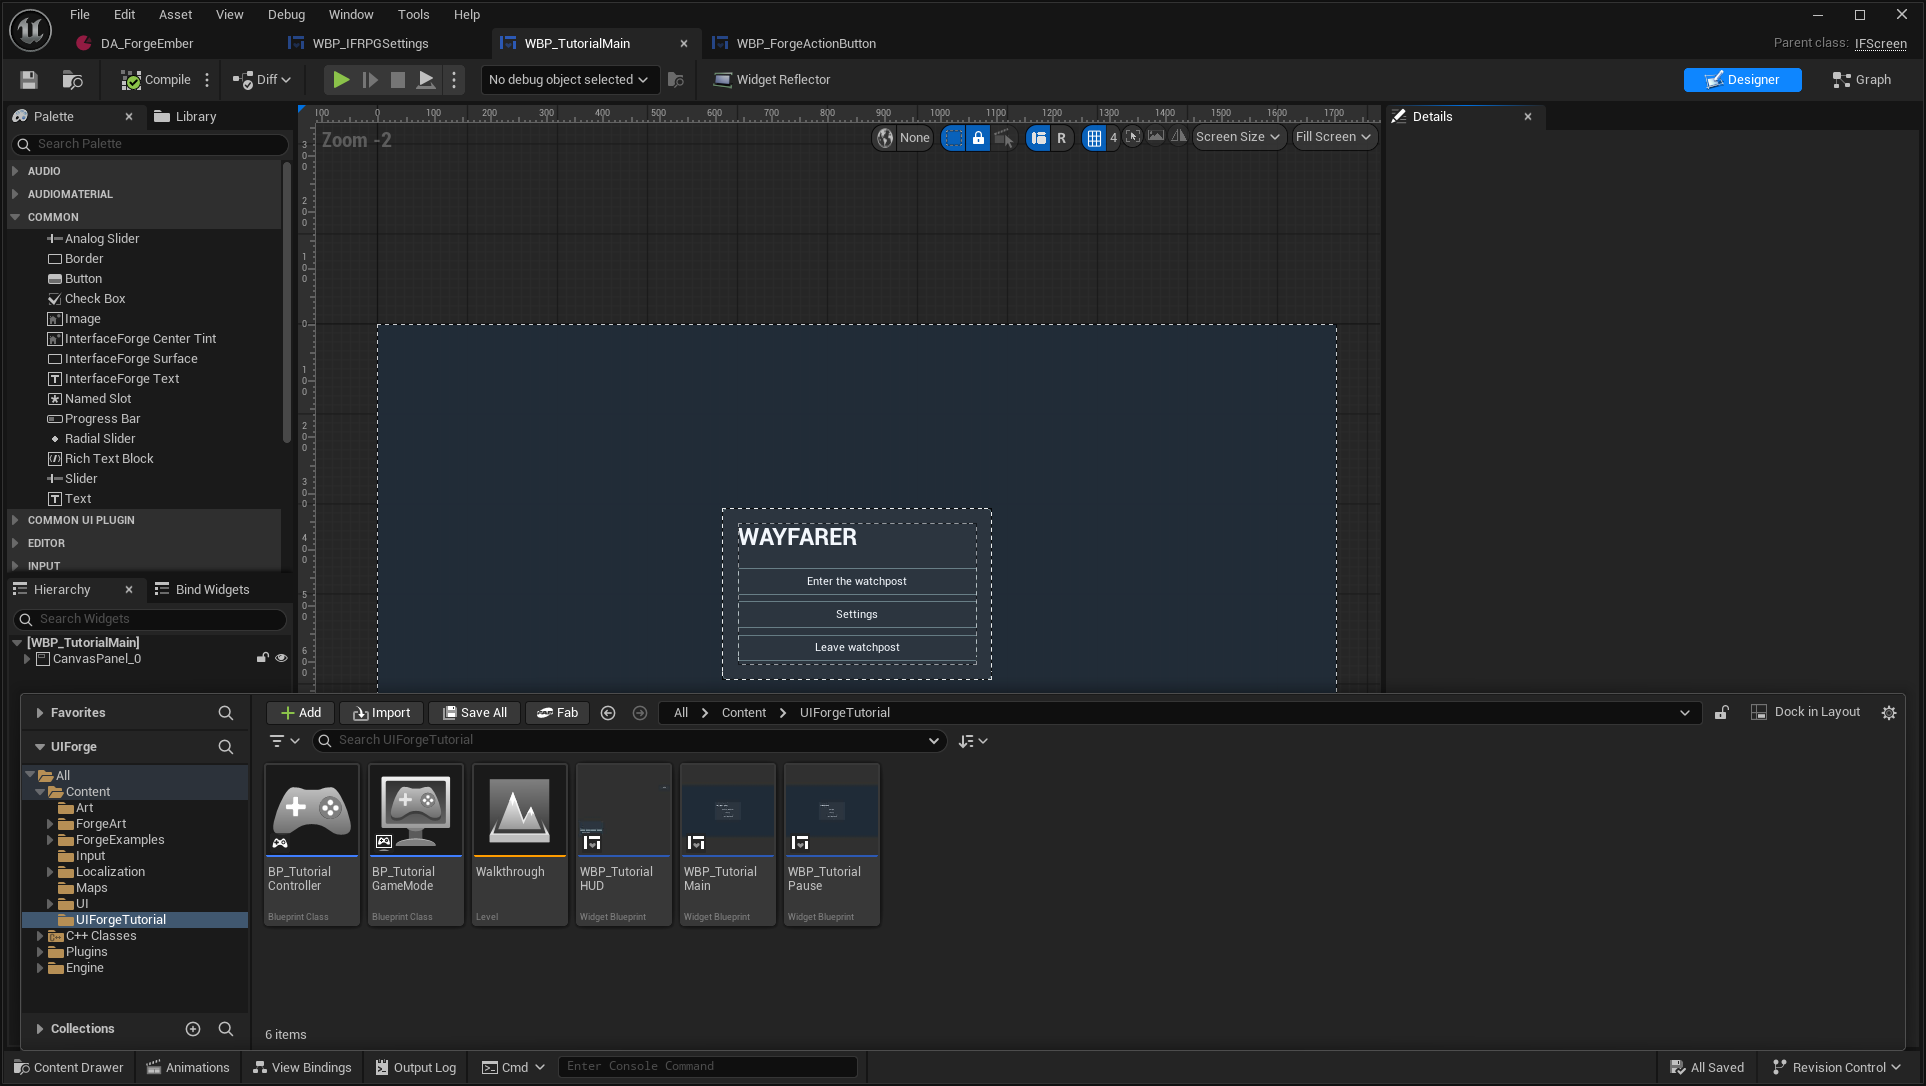
Press Ctrl+Space to open the Content Drawer. Select UIForgeTutorial in the folder tree, then double-click Walkthrough. These six assets form the small learning flow.
The full playable games are separate references: Emberfall and Ironfront. The learning map is intentionally small so its public Blueprint flow remains easy to follow.
2. Set up CommonUI before building menus
In Edit → Project Settings, configure:
| Find | Set |
|---|---|
| Engine → General Settings → Game Viewport Client Class | CommonGameViewportClient |
| Common Input Settings → Input Data | IFNavigationInputData or your compatible CommonUI input-data class |
| Plugins → Common UI Framework → Common Button Accept Key Handling | Trigger Click |
| Enhanced Input → Enable User Settings | Enabled for player-mappable bindings |
| Input → default player-input/component classes | EnhancedPlayerInput / EnhancedInputComponent when using Enhanced Input |
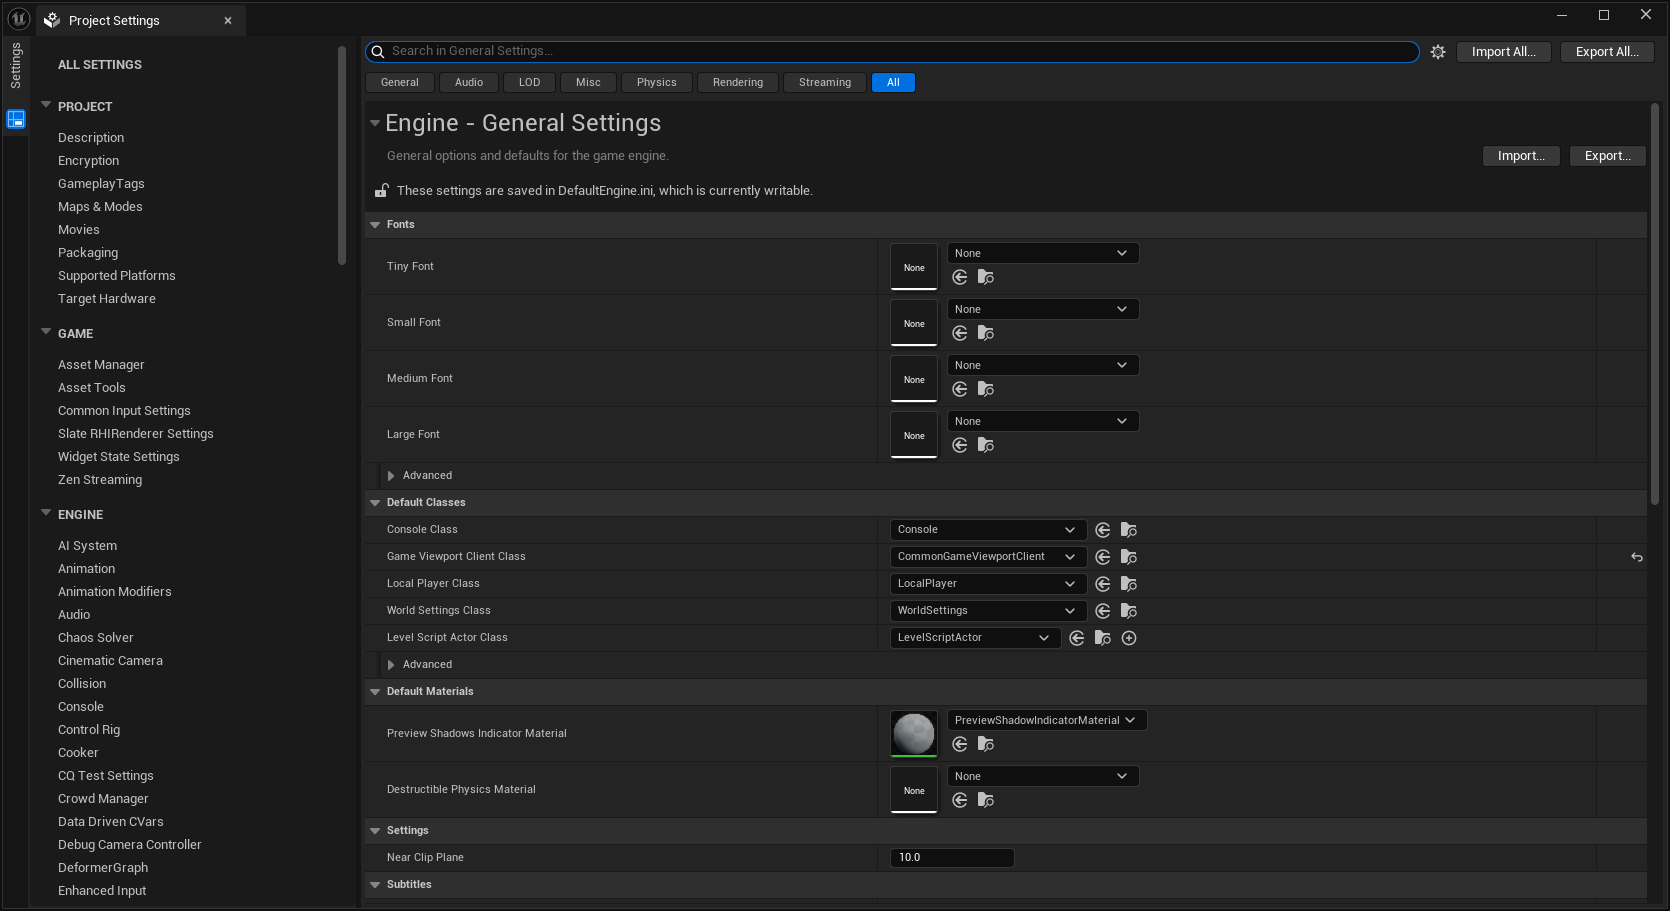
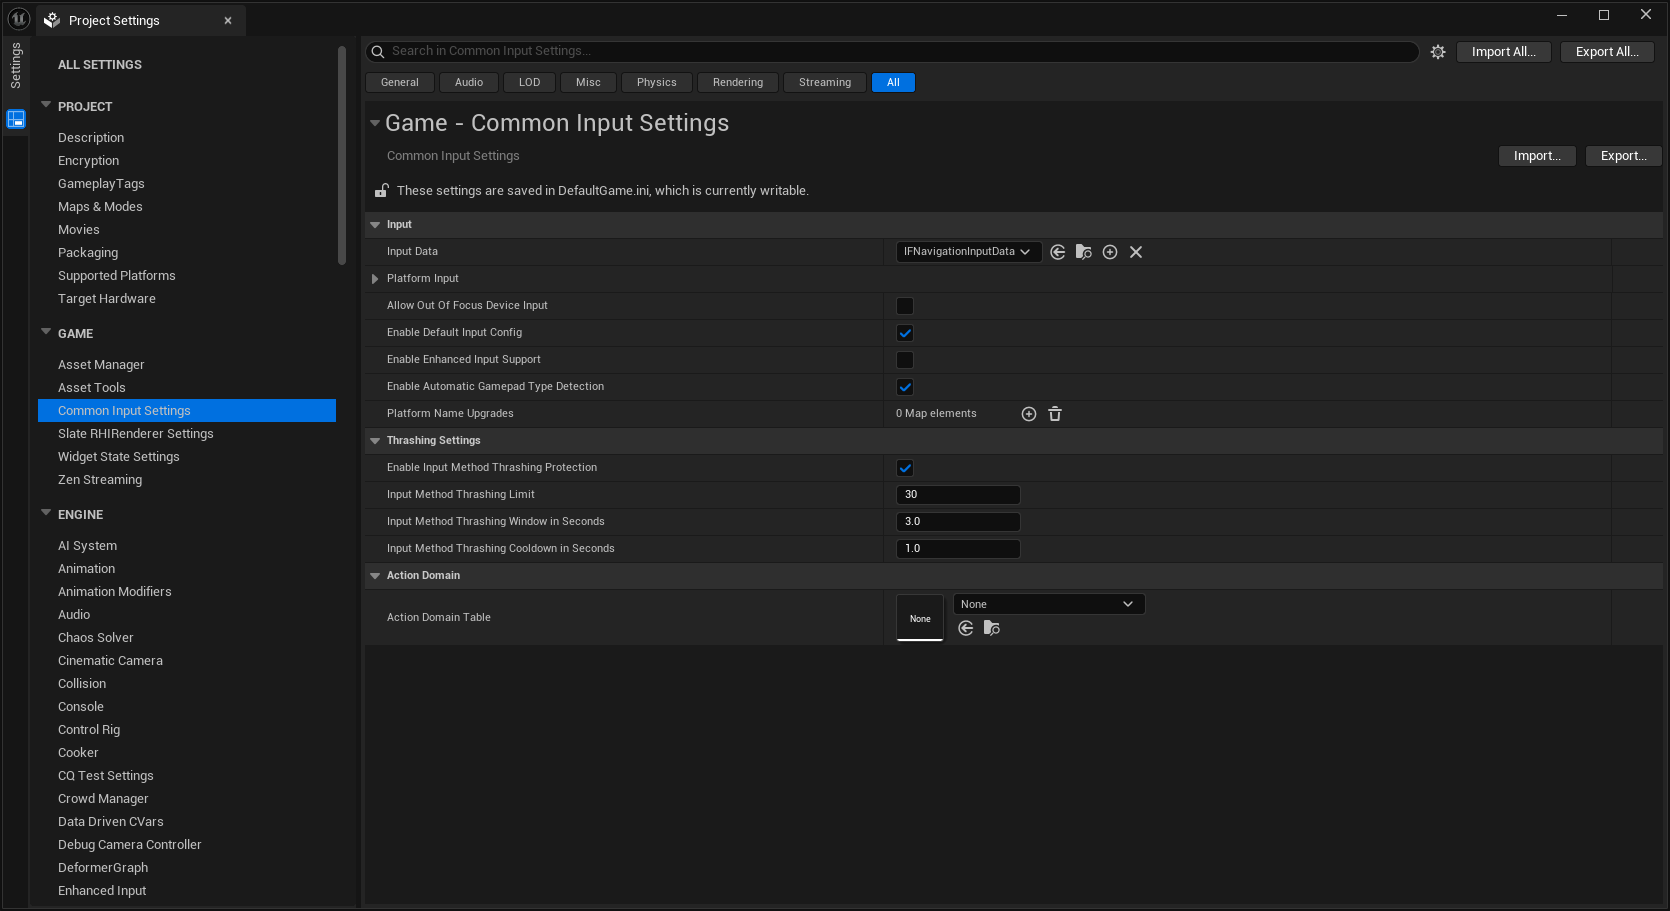
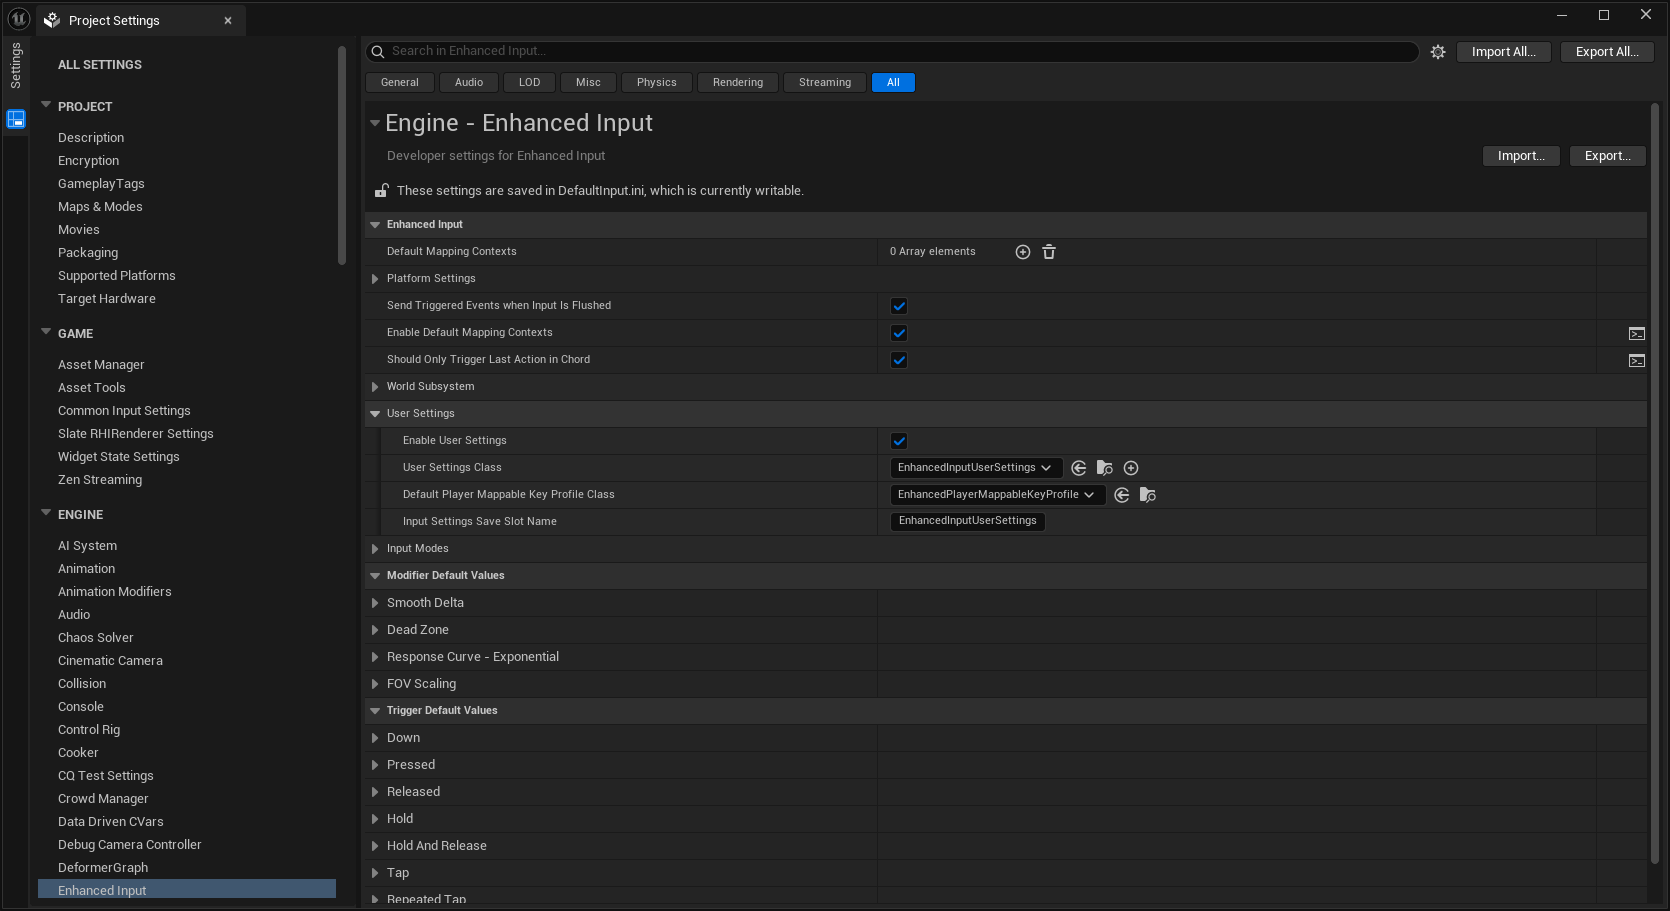
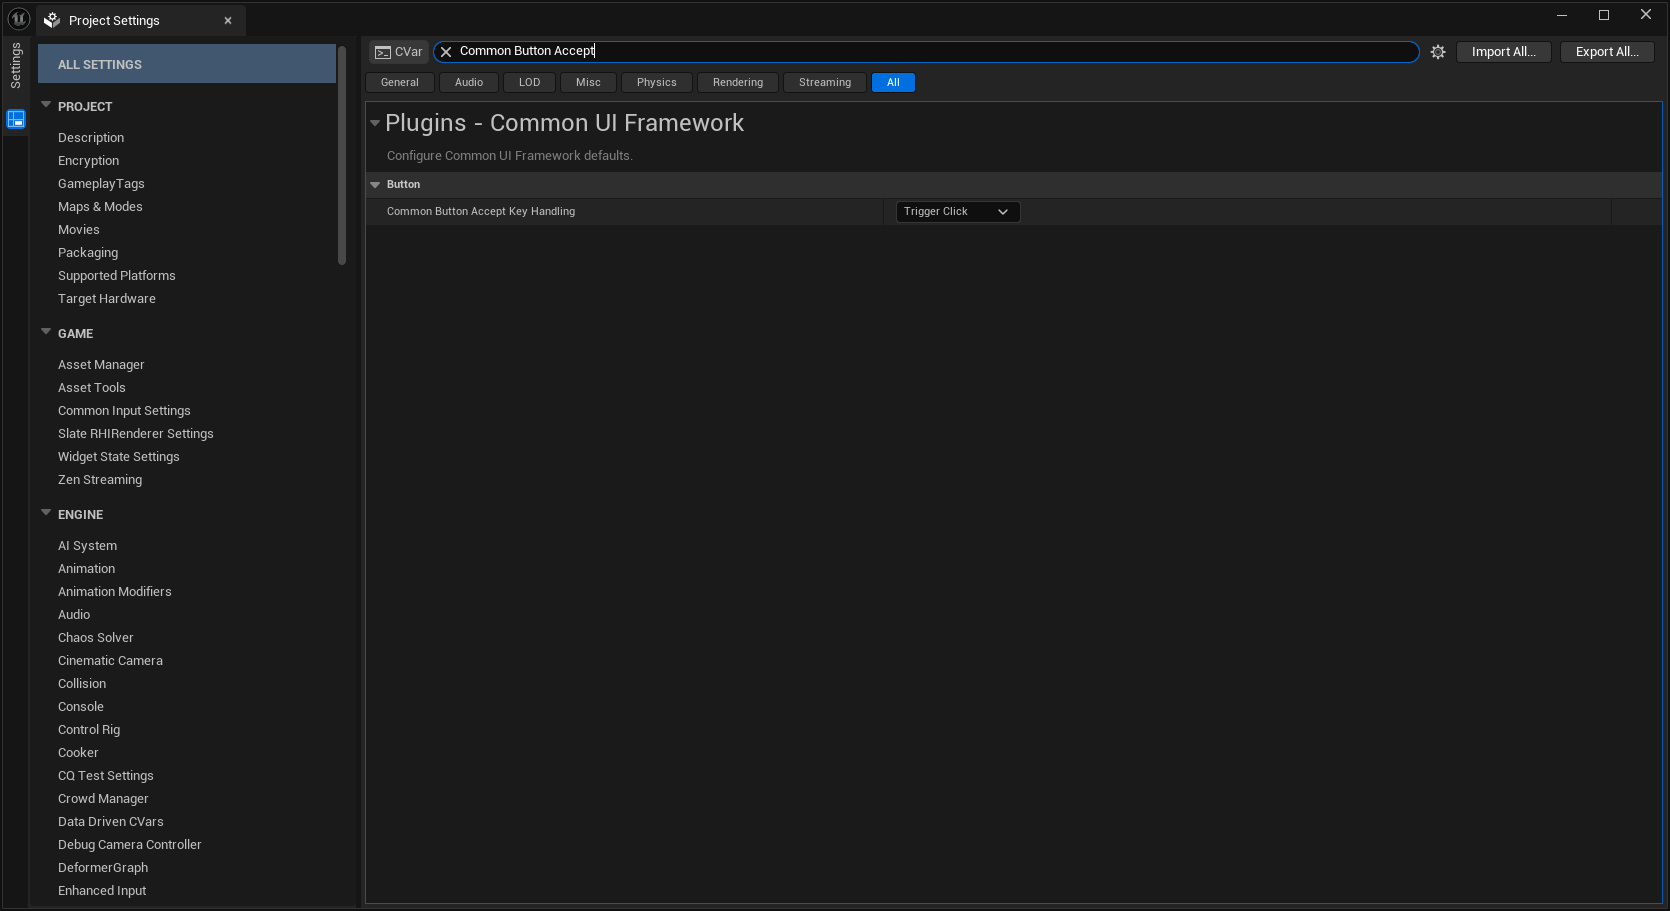
The full integration guide explains the existing-engine responsibilities and registration order. Keyboard/controller prompts should use real mapping names from your Enhanced Input context. They should not be separate strings that become stale after remapping.
3. Create one local-player root
Open: /Game/UIForgeTutorial/BP_TutorialController, EventGraph.
In the local controller's Event BeginPlay, branch on Is Local Controller. Get IFLocal Player Subsystem, call Set Theme, and call Create Root with Root Class = IFRootLayout. Use the returned root for Push Screen, Layer = Menu, Screen Class = your IFScreen Blueprint.
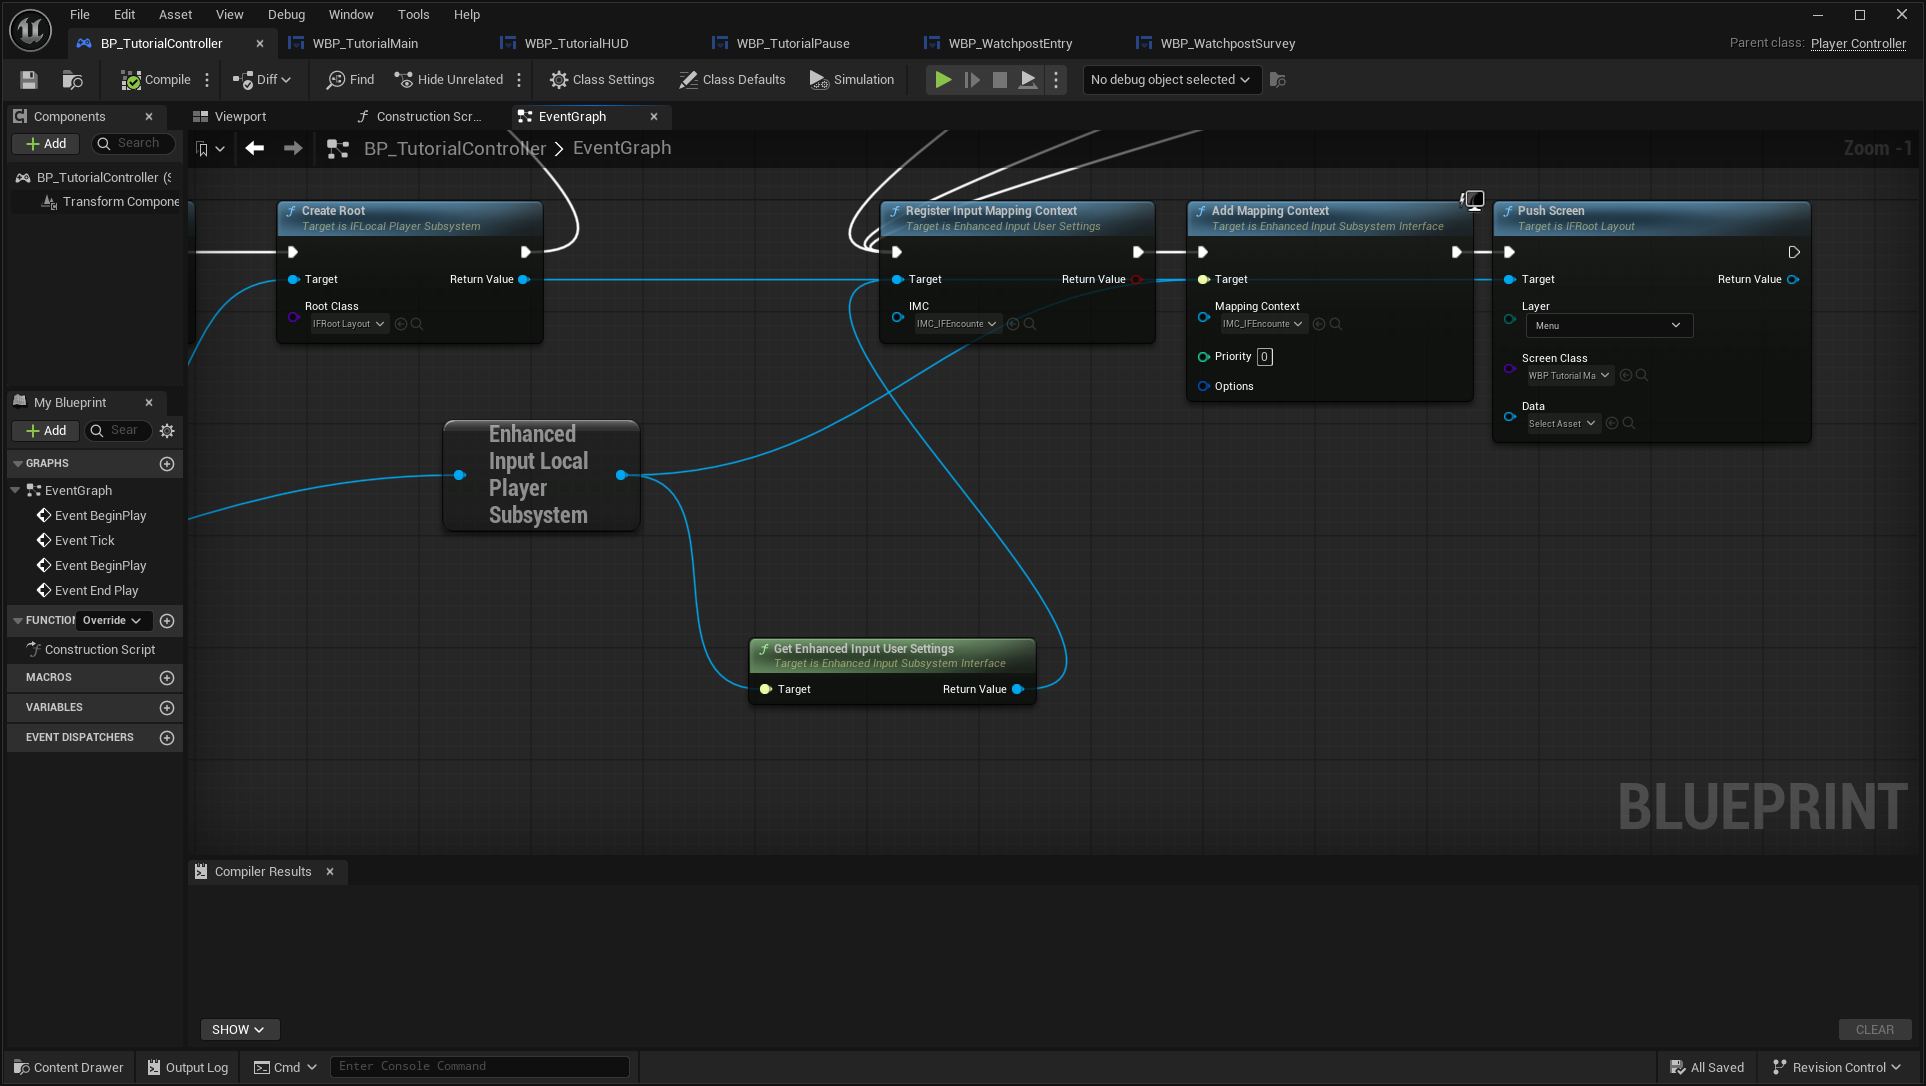
Notice the blue Return Value wire from Create Root to Push Screen's Target. Register Input Mapping Context belongs to Enhanced Input User Settings; Add Mapping Context belongs to the Enhanced Input local-player subsystem. Registration makes mappings available for rebinding; adding the context enables gameplay input.
Expected: one root for this local player and one menu. Keep your existing mapping priorities. Do not call Clear All Mappings or create a new viewport root every time a screen opens. On EndPlay or world travel, Remove Root and let the next local controller initialize its own interface.
4. Design the menu in Blueprint
Open: /Game/UIForgeTutorial/WBP_TutorialMain, Designer. Its parent is IFScreen. For your own screen, create a Widget Blueprint and choose IFScreen in the parent-class picker.
Build the background/layout with ordinary UMG panels. Add IFButton controls with useful Designer names, such as PlayChoice and SettingsChoice. Select a button and set Interface Forge → Button → Label. Native fallback labels are visible in Designer; a Blueprint-owned content tree can replace them.
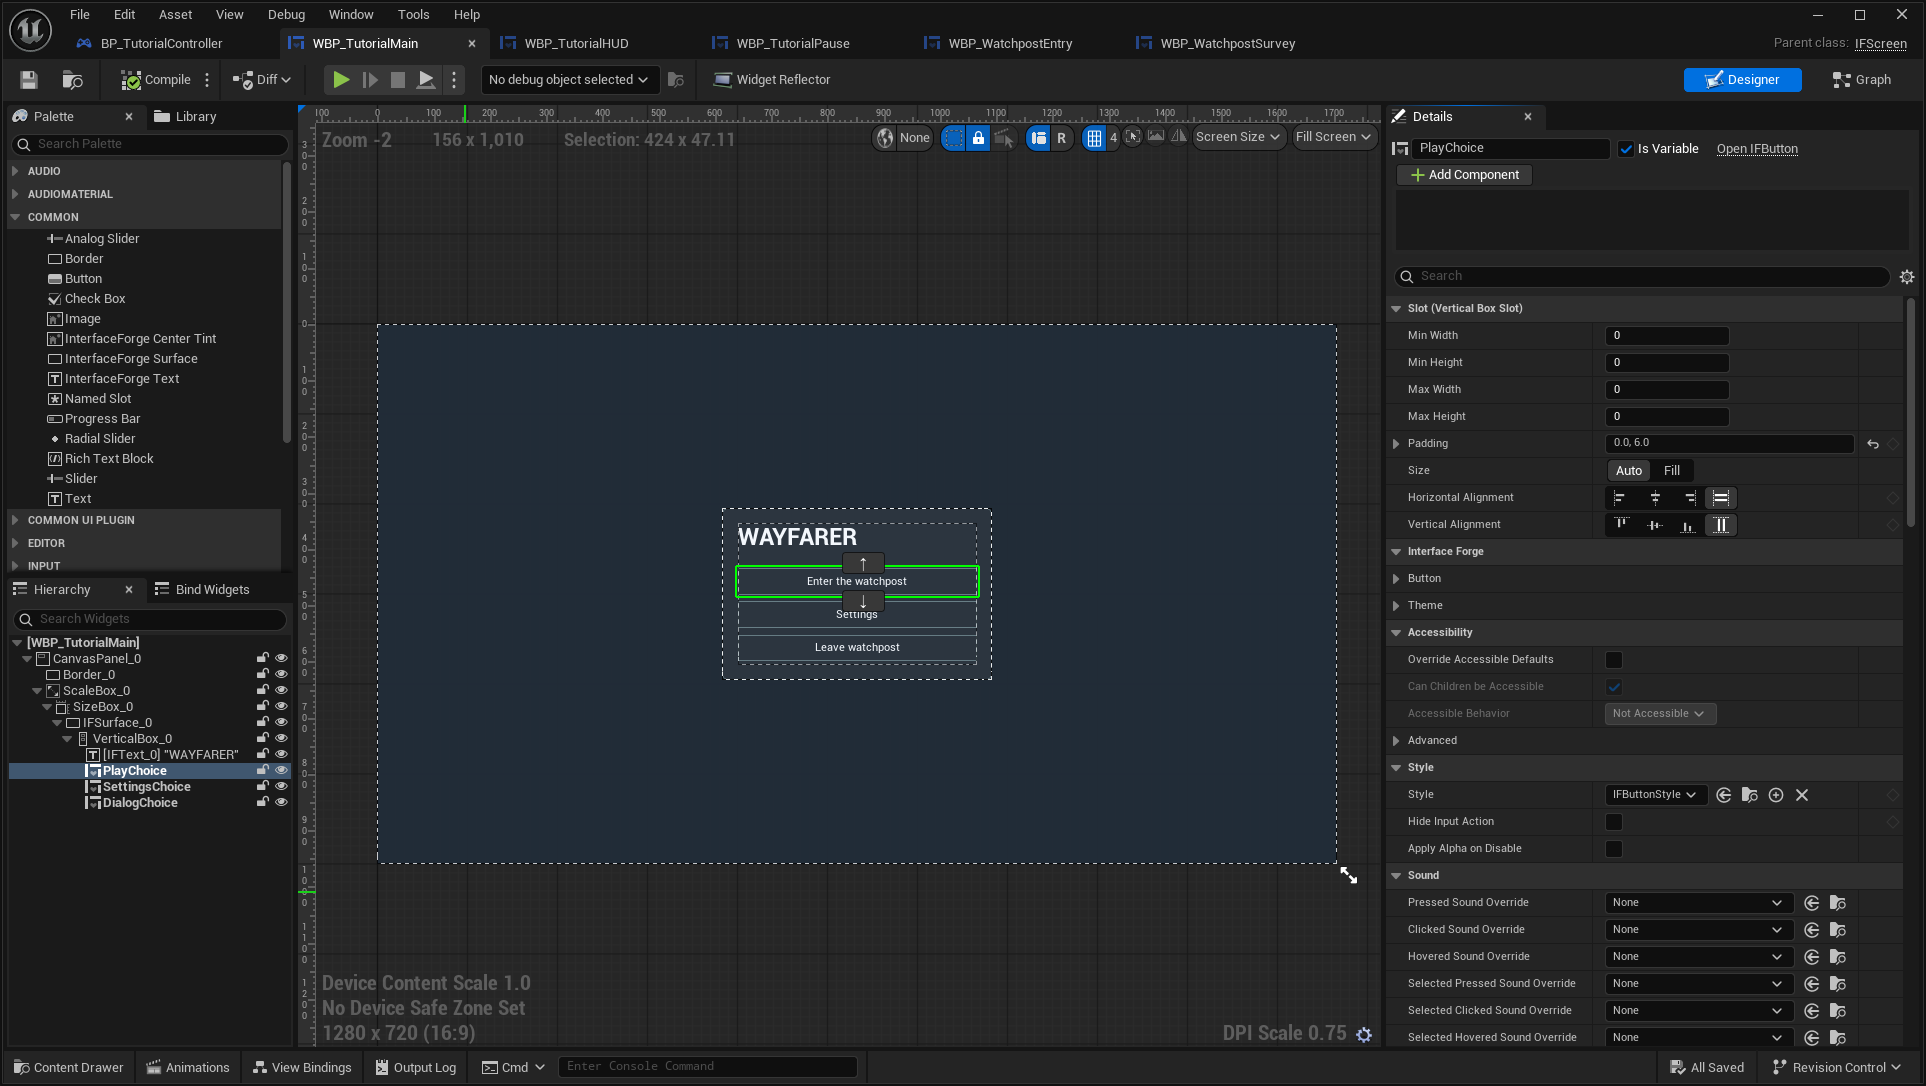
The left Hierarchy selects the actual control. The right Details panel edits its label and presentation. The centered preview is this small learning screen; your game can use a different composition and theme.
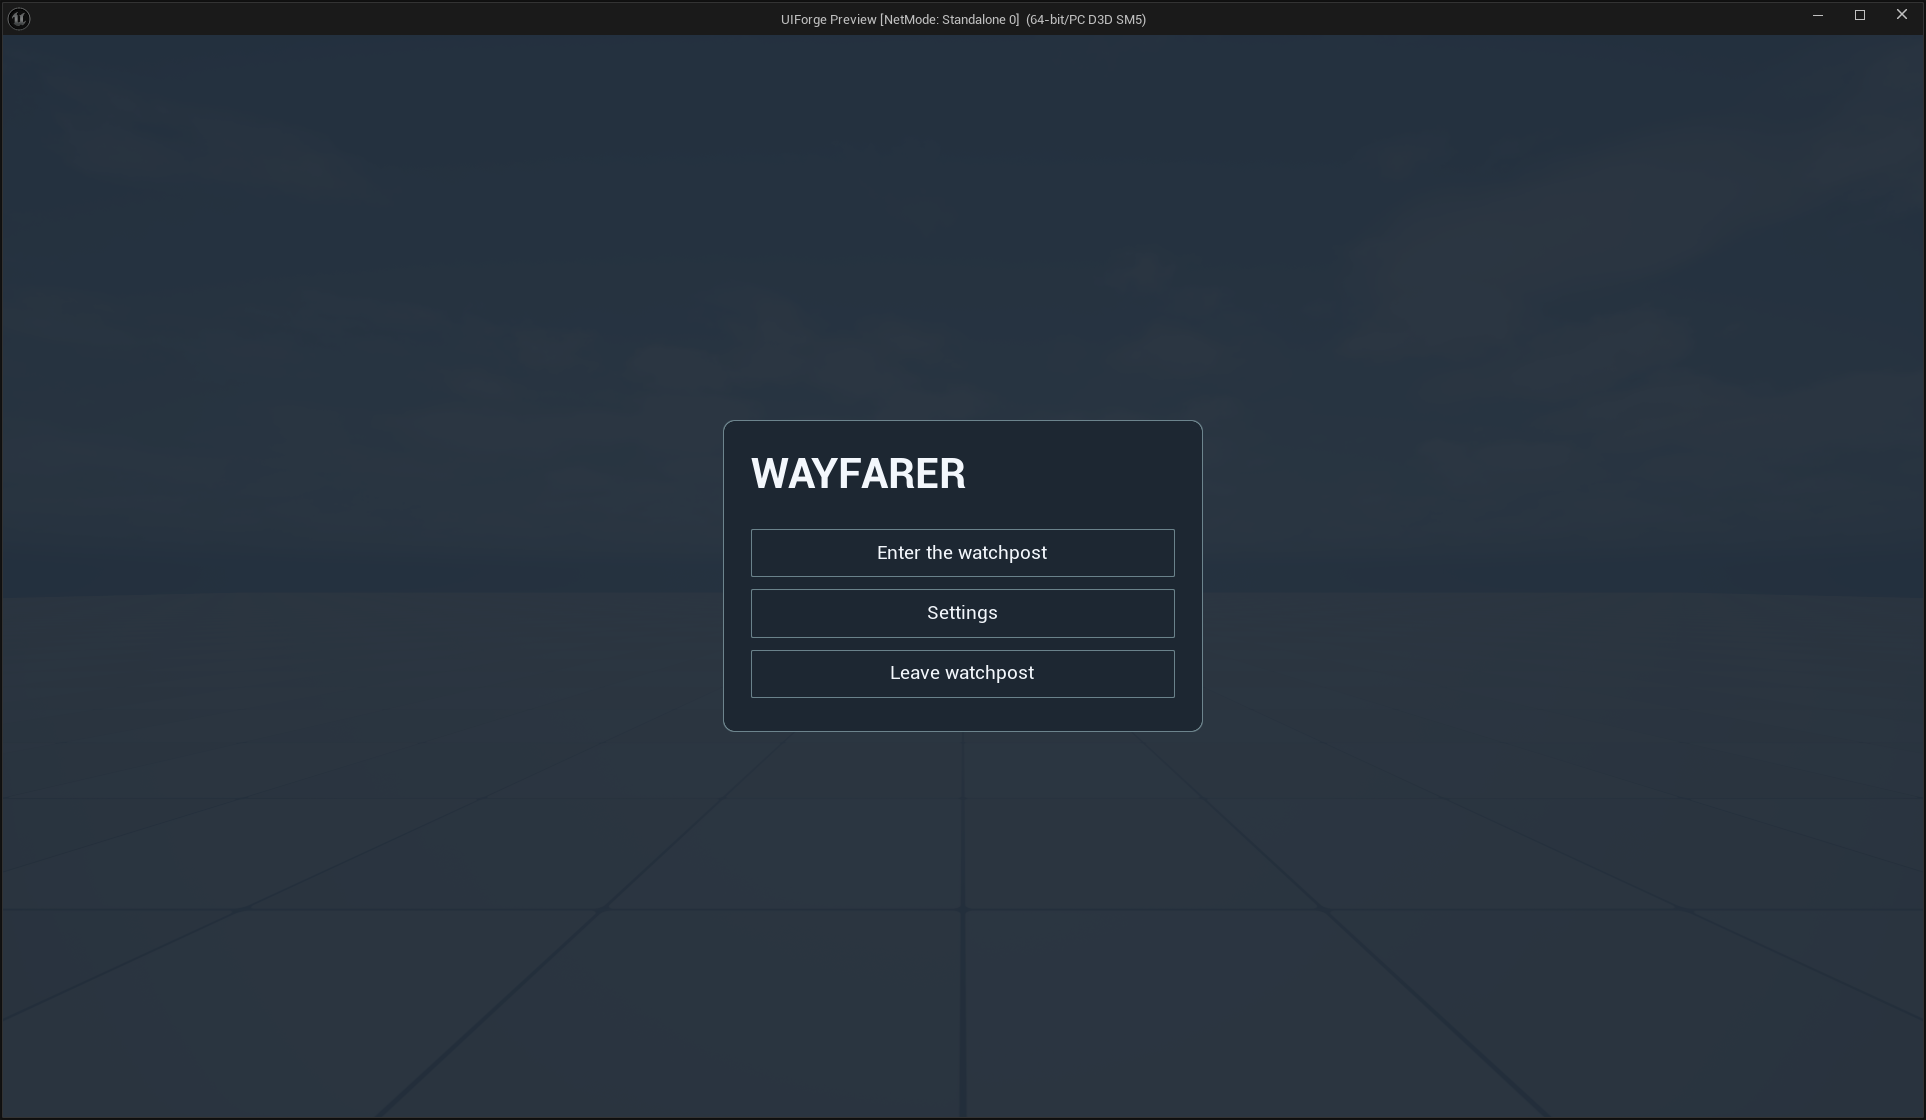
Expected: the same widget is editable in Designer and clickable in Play. Decorative images should be hit-test invisible so they do not cover buttons.
5. Assign input ownership and initial focus
Choose Class Defaults. Set Input Policy = Menu. Set Initial Focus Name = PlayChoice and Fallback Focus Name = SettingsChoice; these are Designer widget names, not the label text.
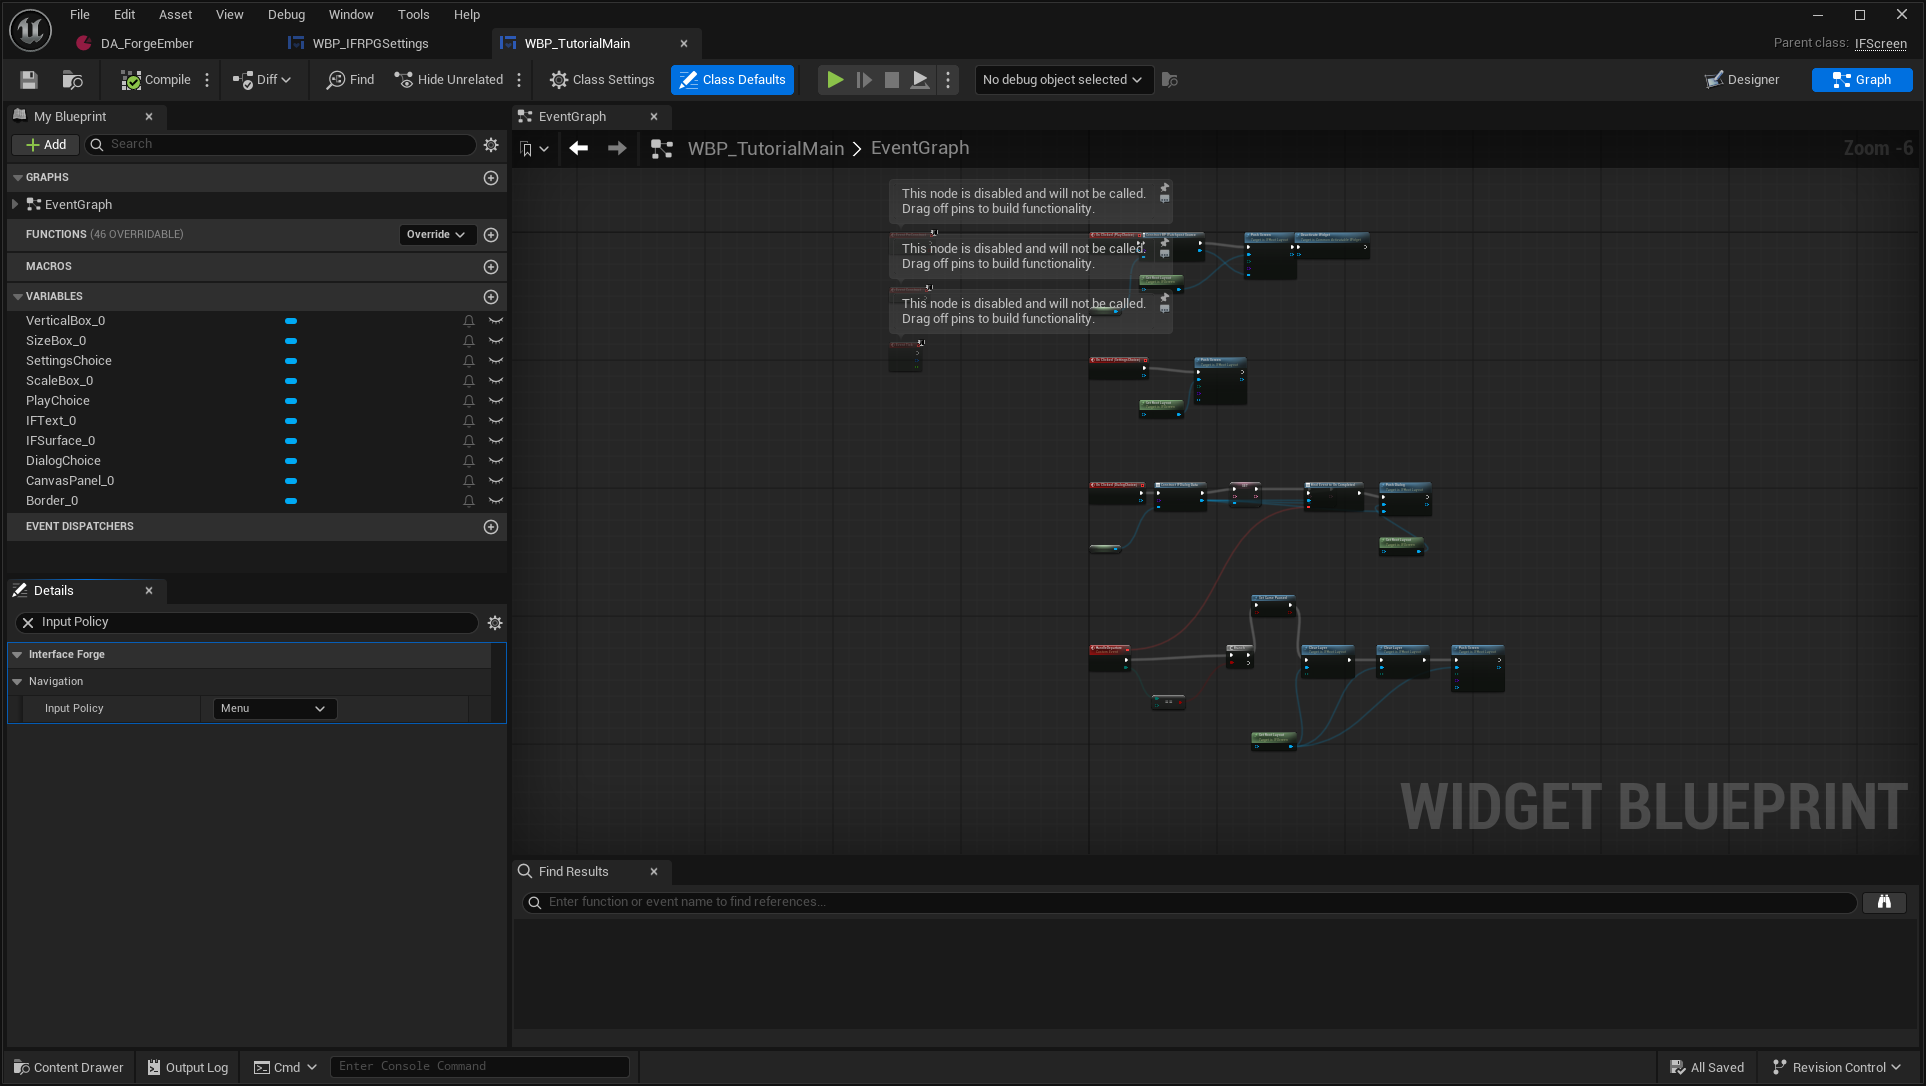
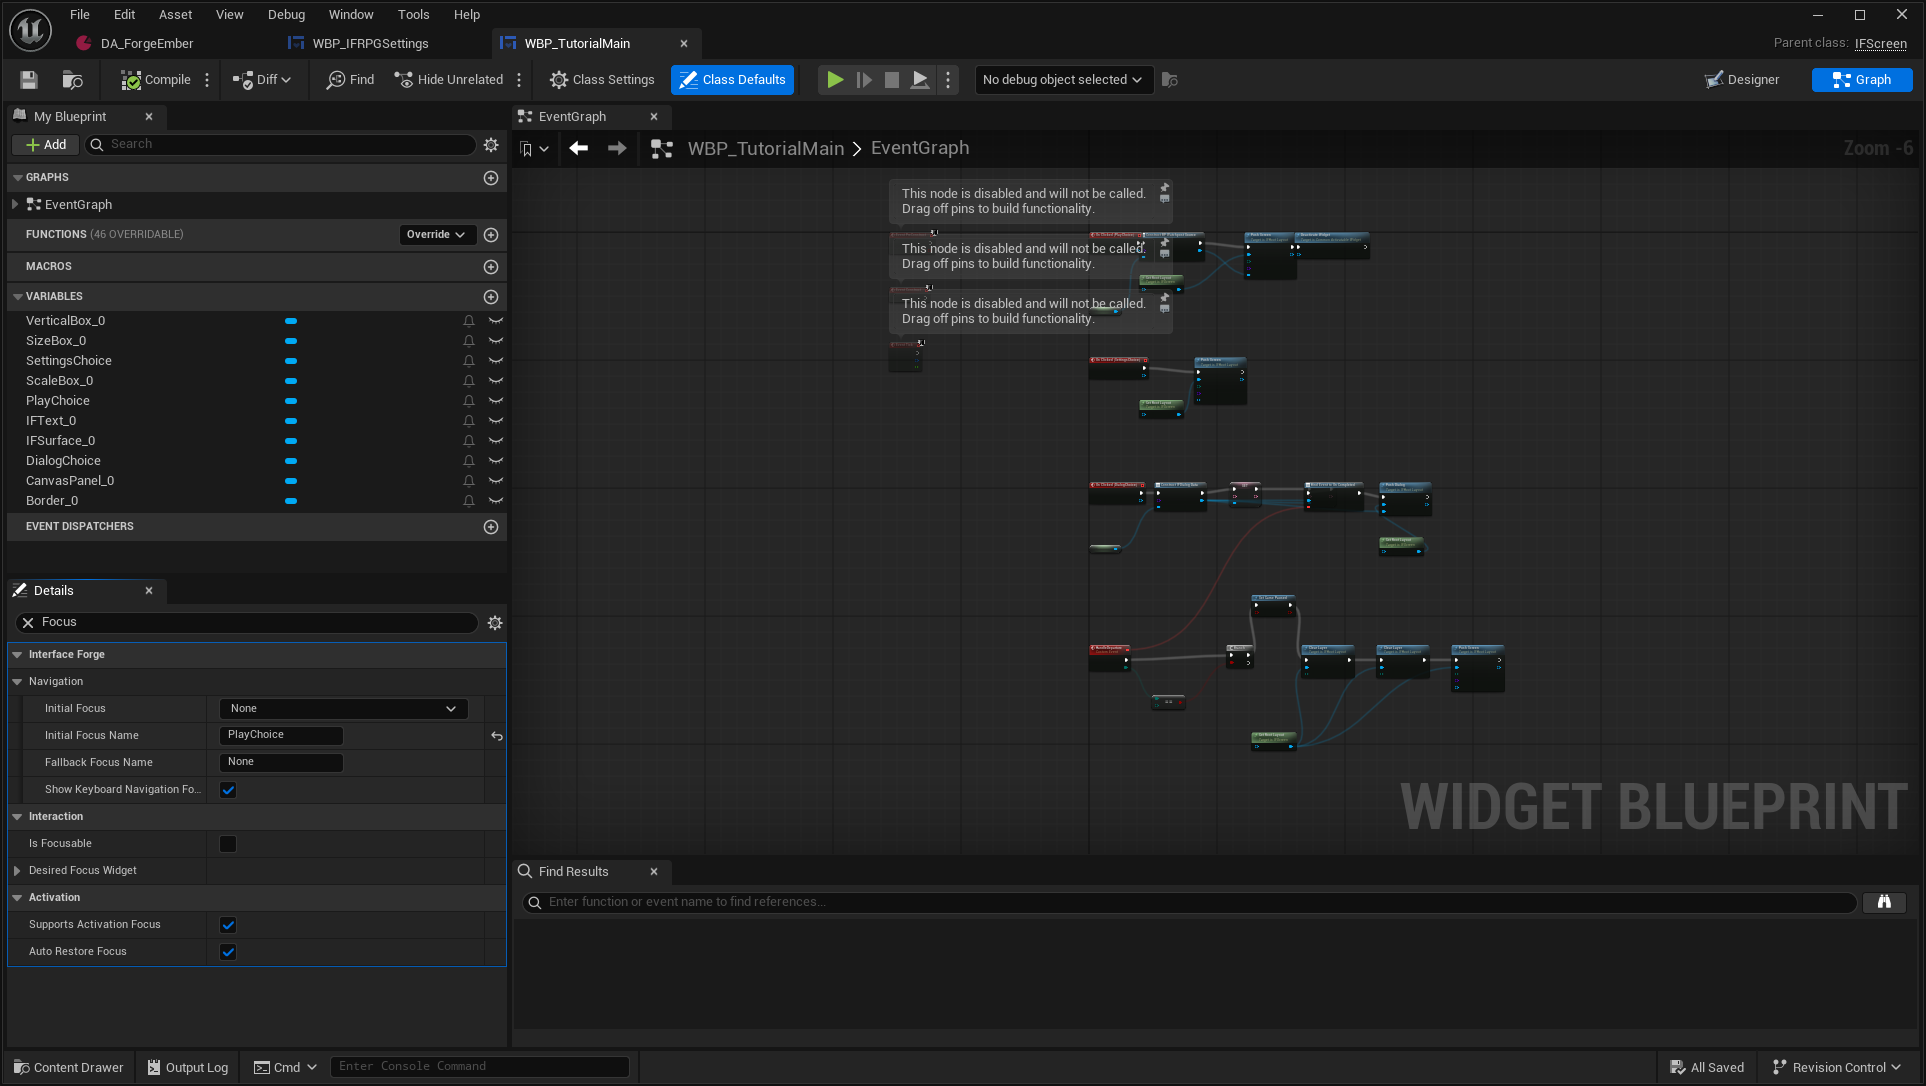
The saved asset uses PlayChoice for initial focus and leaves fallback unset. Assign SettingsChoice as a fallback in your own screen when PlayChoice may be hidden or disabled.
Expected: keyboard Accept activates a focused button, Back follows the top screen's policy, and returning from a popup restores useful focus. CommonUI owns routing. Do not add a competing Set Input Mode loop on every tick. See input switching for the shared detector and focus/navigation for screen contracts. Physical controller/touch testing is still deferred.
6. Open a HUD through the same root
Select PlayChoice, add its On Clicked event (On Clicked (PlayChoice) in the graph), and open the Graph. Use Get Root Layout → Push Screen, Layer = HUD, Screen Class = your HUD. Pass a data source on Data. Deactivate the main screen after the HUD is pushed.
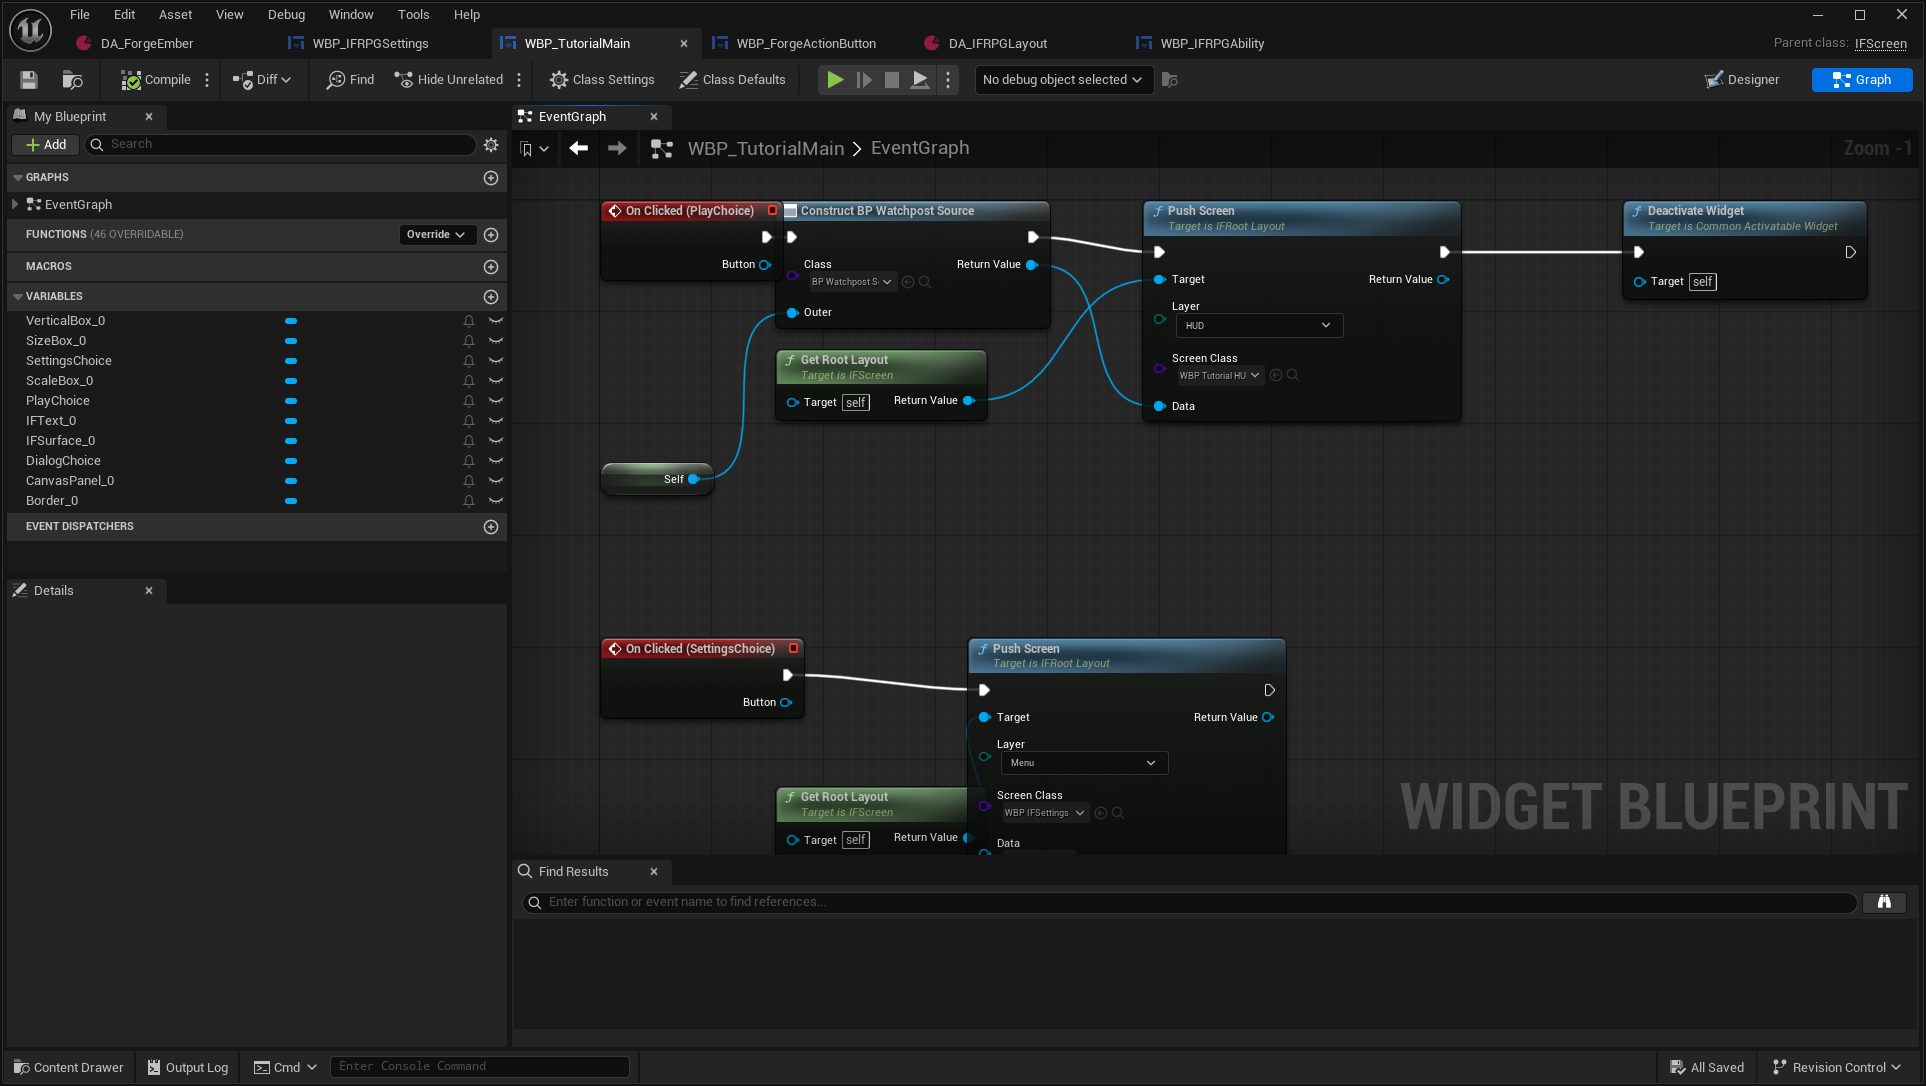
Expected: your game continues underneath the HUD, while menus still use their own layer. The data object belongs to your game; it does not move gameplay rules into the UI plugin.
7. Create a custom entry and connect its data
Open: /Game/UIForgeTutorial/WBP_TutorialHUD, Designer. SurveyRecord is an instance of /Game/UI/Blueprint/WBP_WatchpostEntry, a Blueprint child of IFEntryWidget.
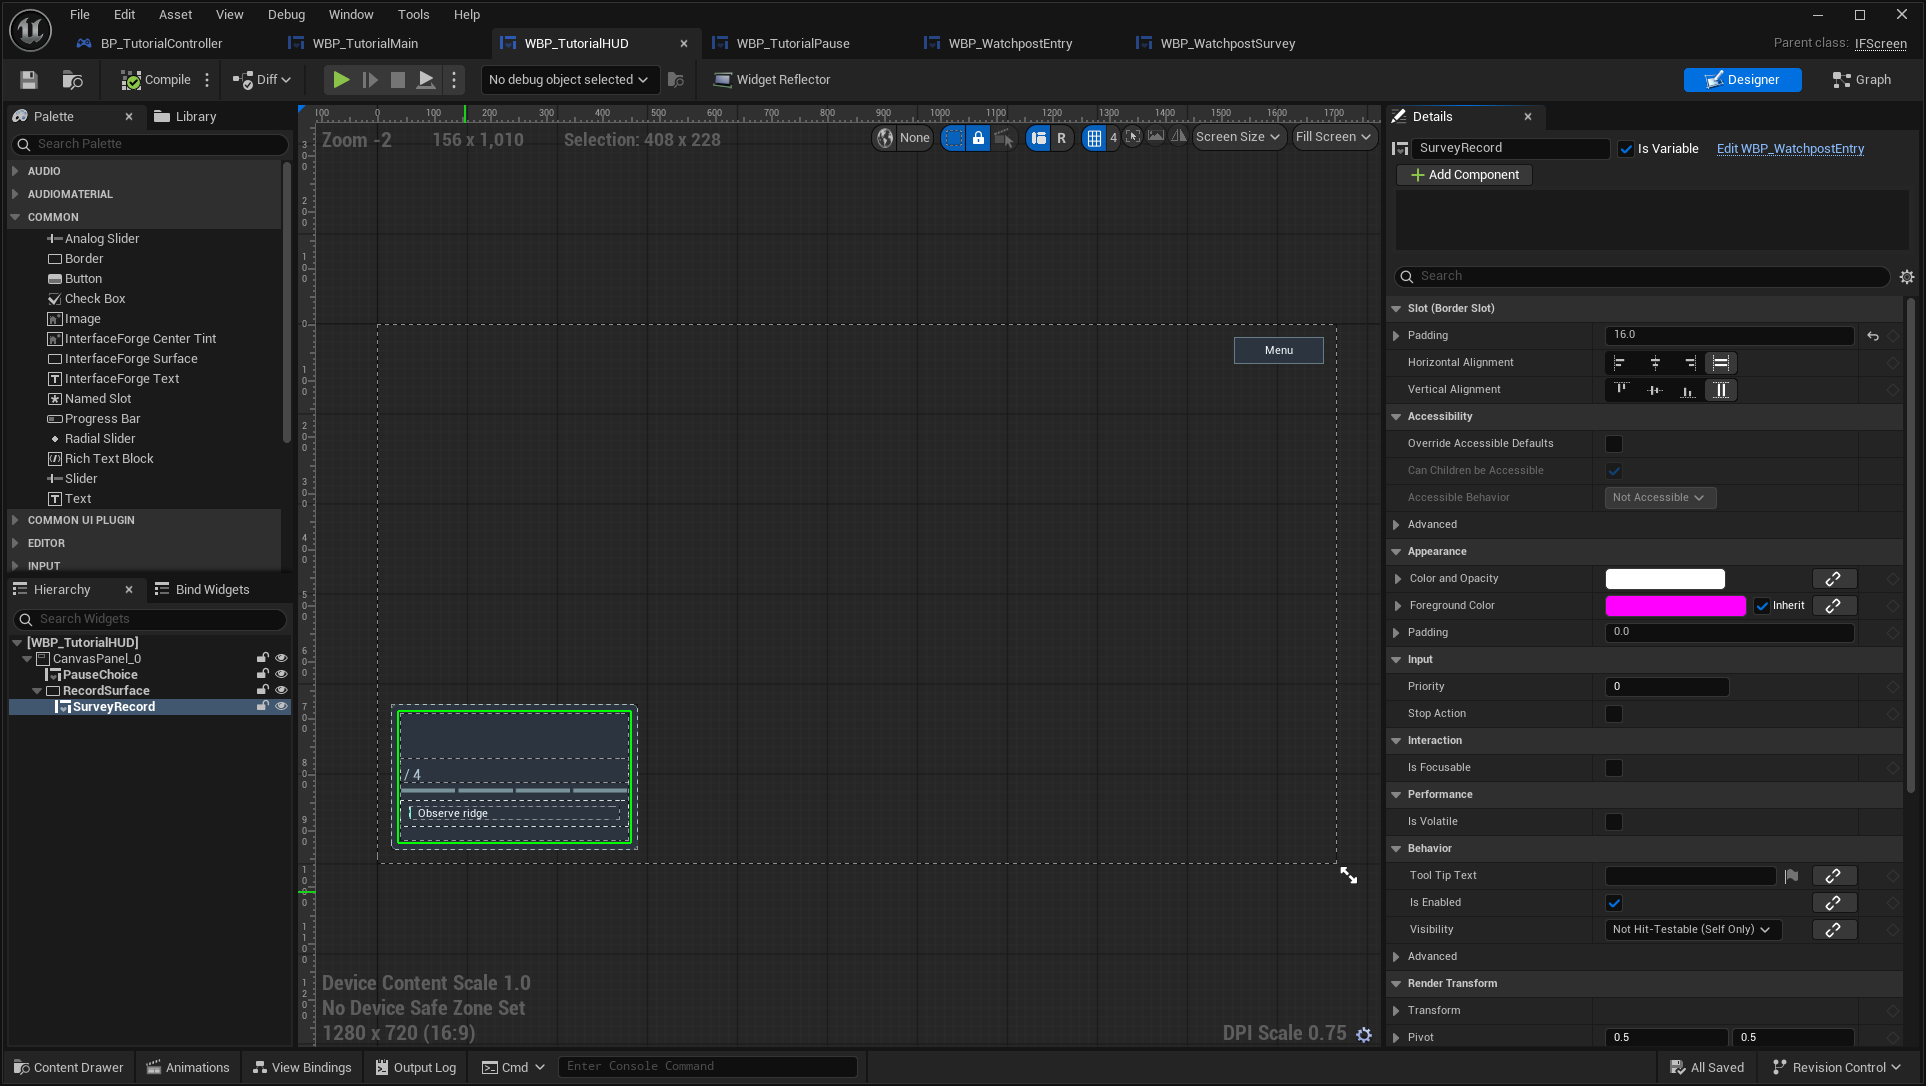
Your screen's Initialize Screen override must call parent first. Use Get UIModel for a stable model and Initialize Entry to provide its data/context to the custom entry.
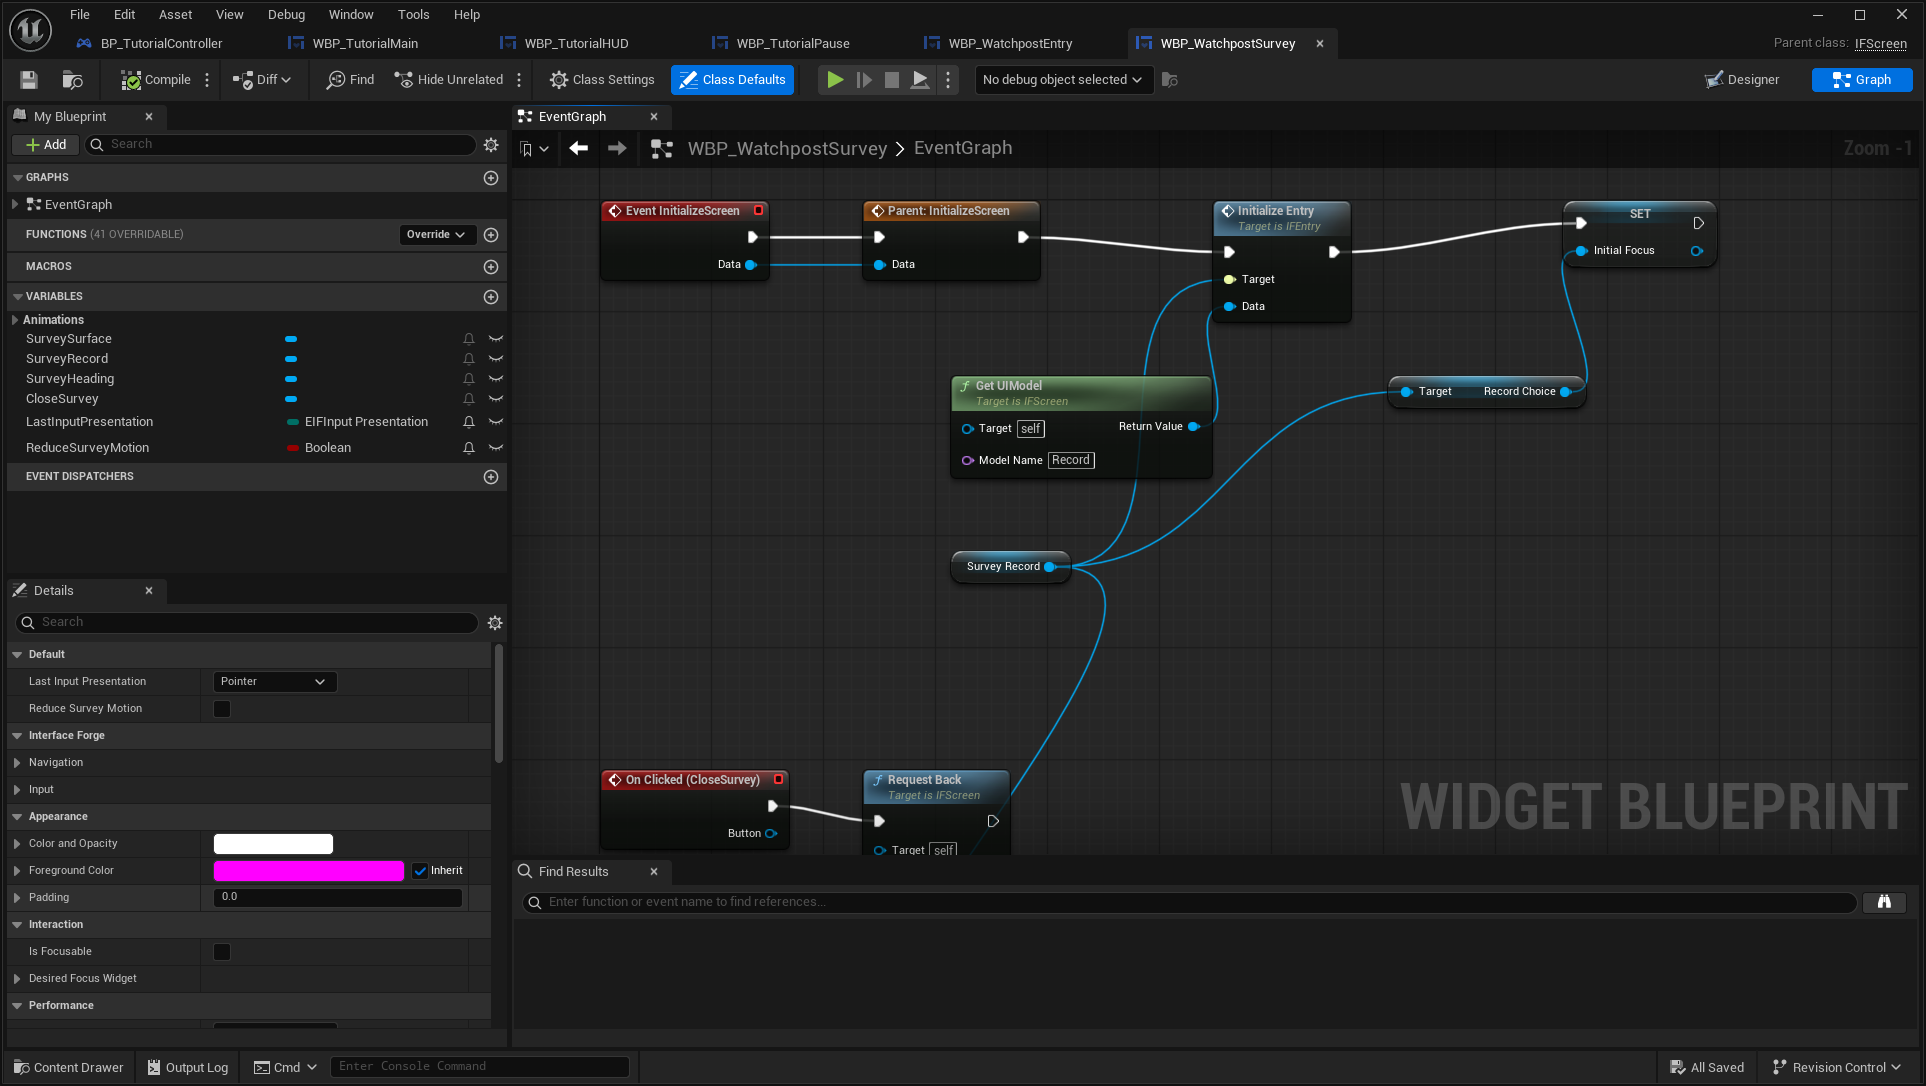
In the entry, implement OnEntryRefreshed. Read Entry Data, cast to the model your project supplied, and update text/progress. A model update should call Notify Data Changed; the entry should not scan the game's population or allocate new records every frame.
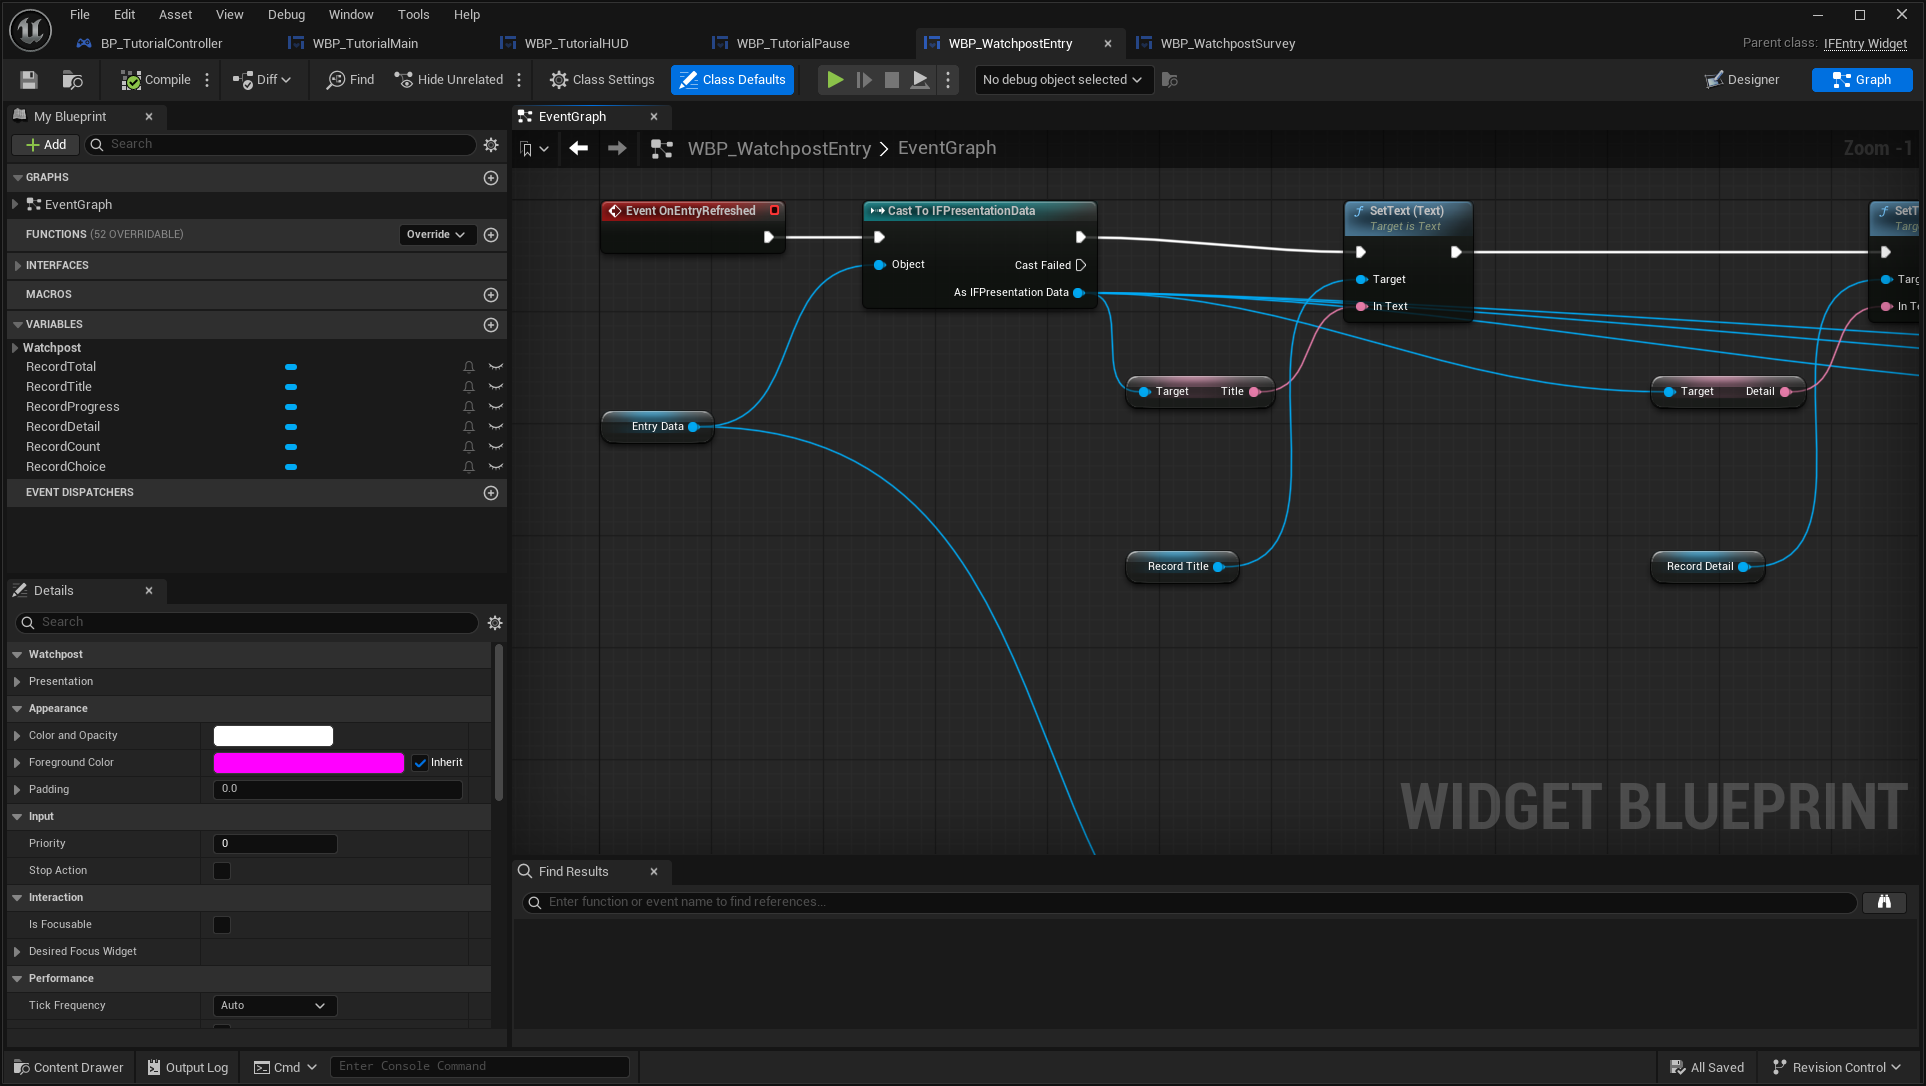
This detail shows the Title connection. Continue along the saved graph for Detail, quantity and progress; use the same notification-driven refresh for your own fields.
Expected: clicking the learning entry requests an action from the Blueprint source; the visible count changes through the model notification. The entry lifecycle recipe covers selection, recycling, subscription cleanup and action context.
8. Add pause and settings
Open: /Game/UIForgeTutorial/WBP_TutorialPause, Graph. Its buttons use the existing root to resume, push the settings screen, or ask for confirmation before returning. Your game owns whether simulation pauses; the menu owns presentation/focus.
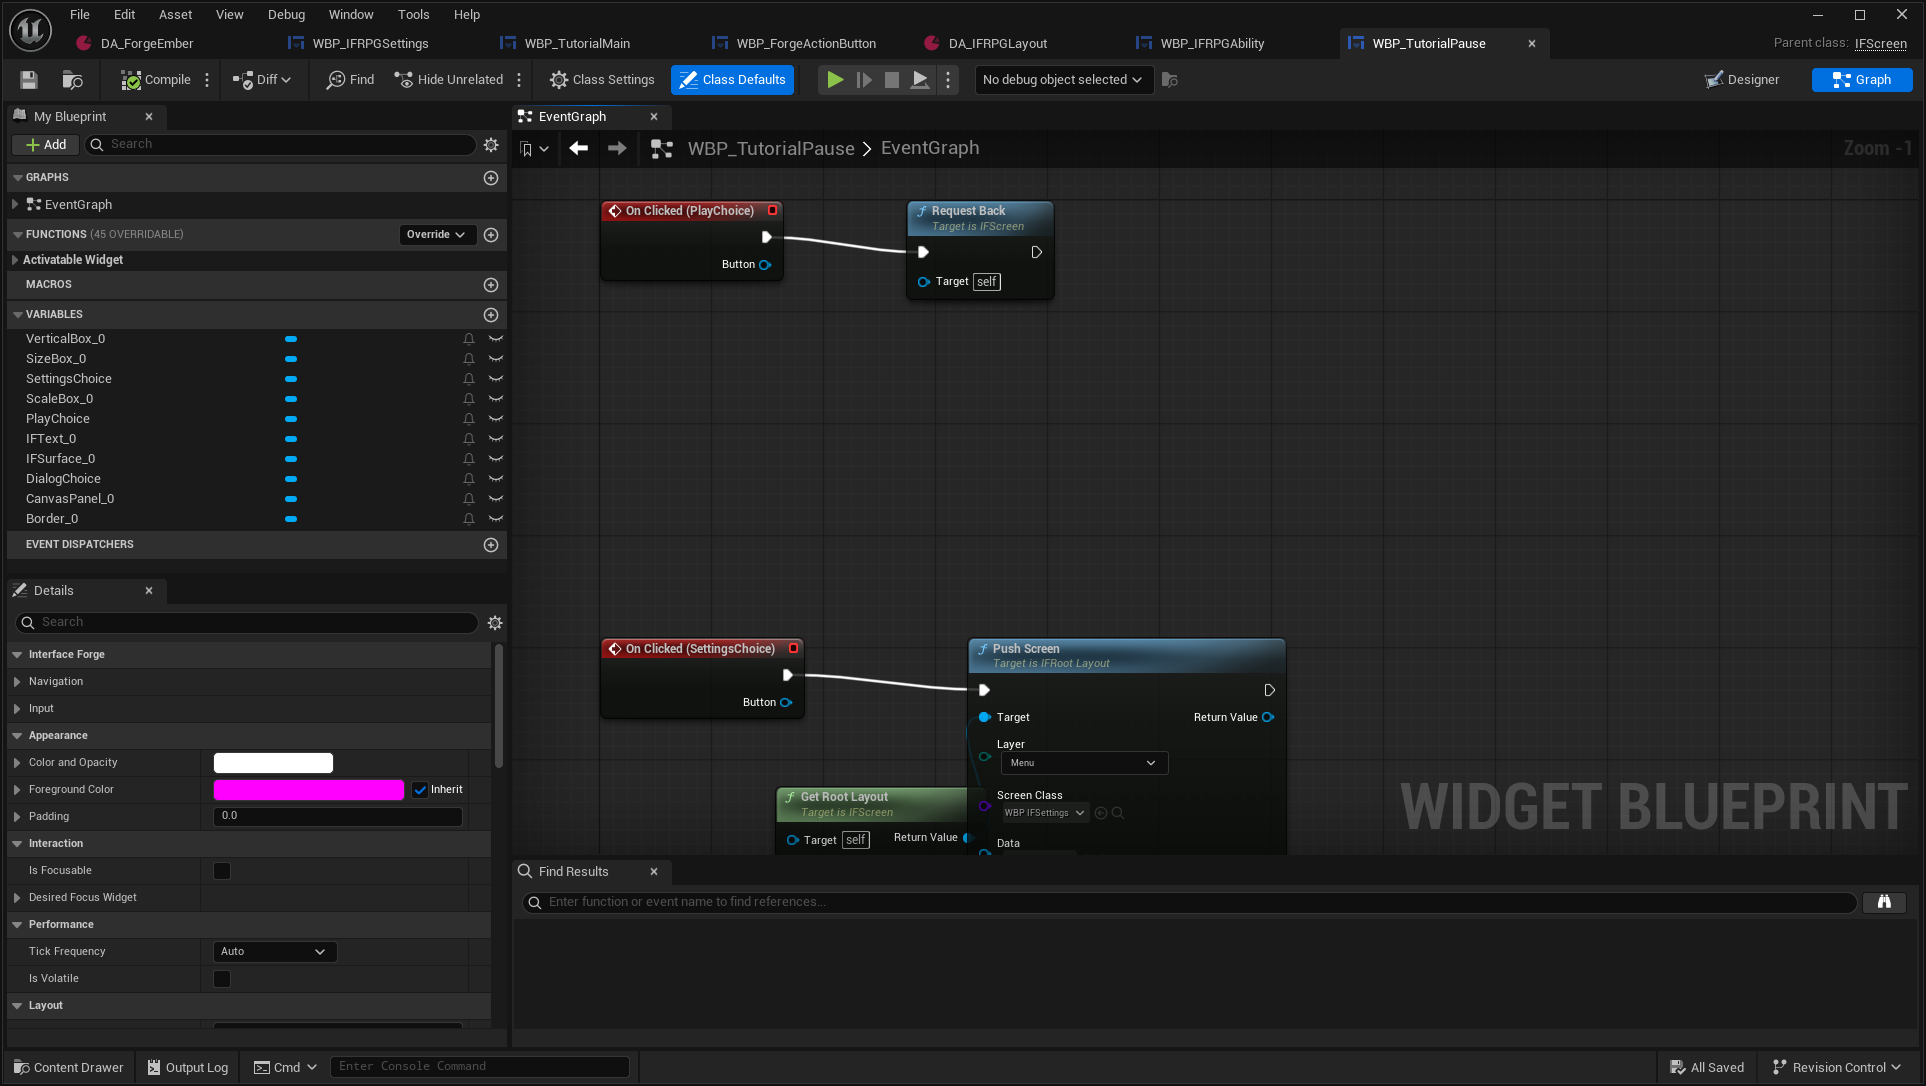
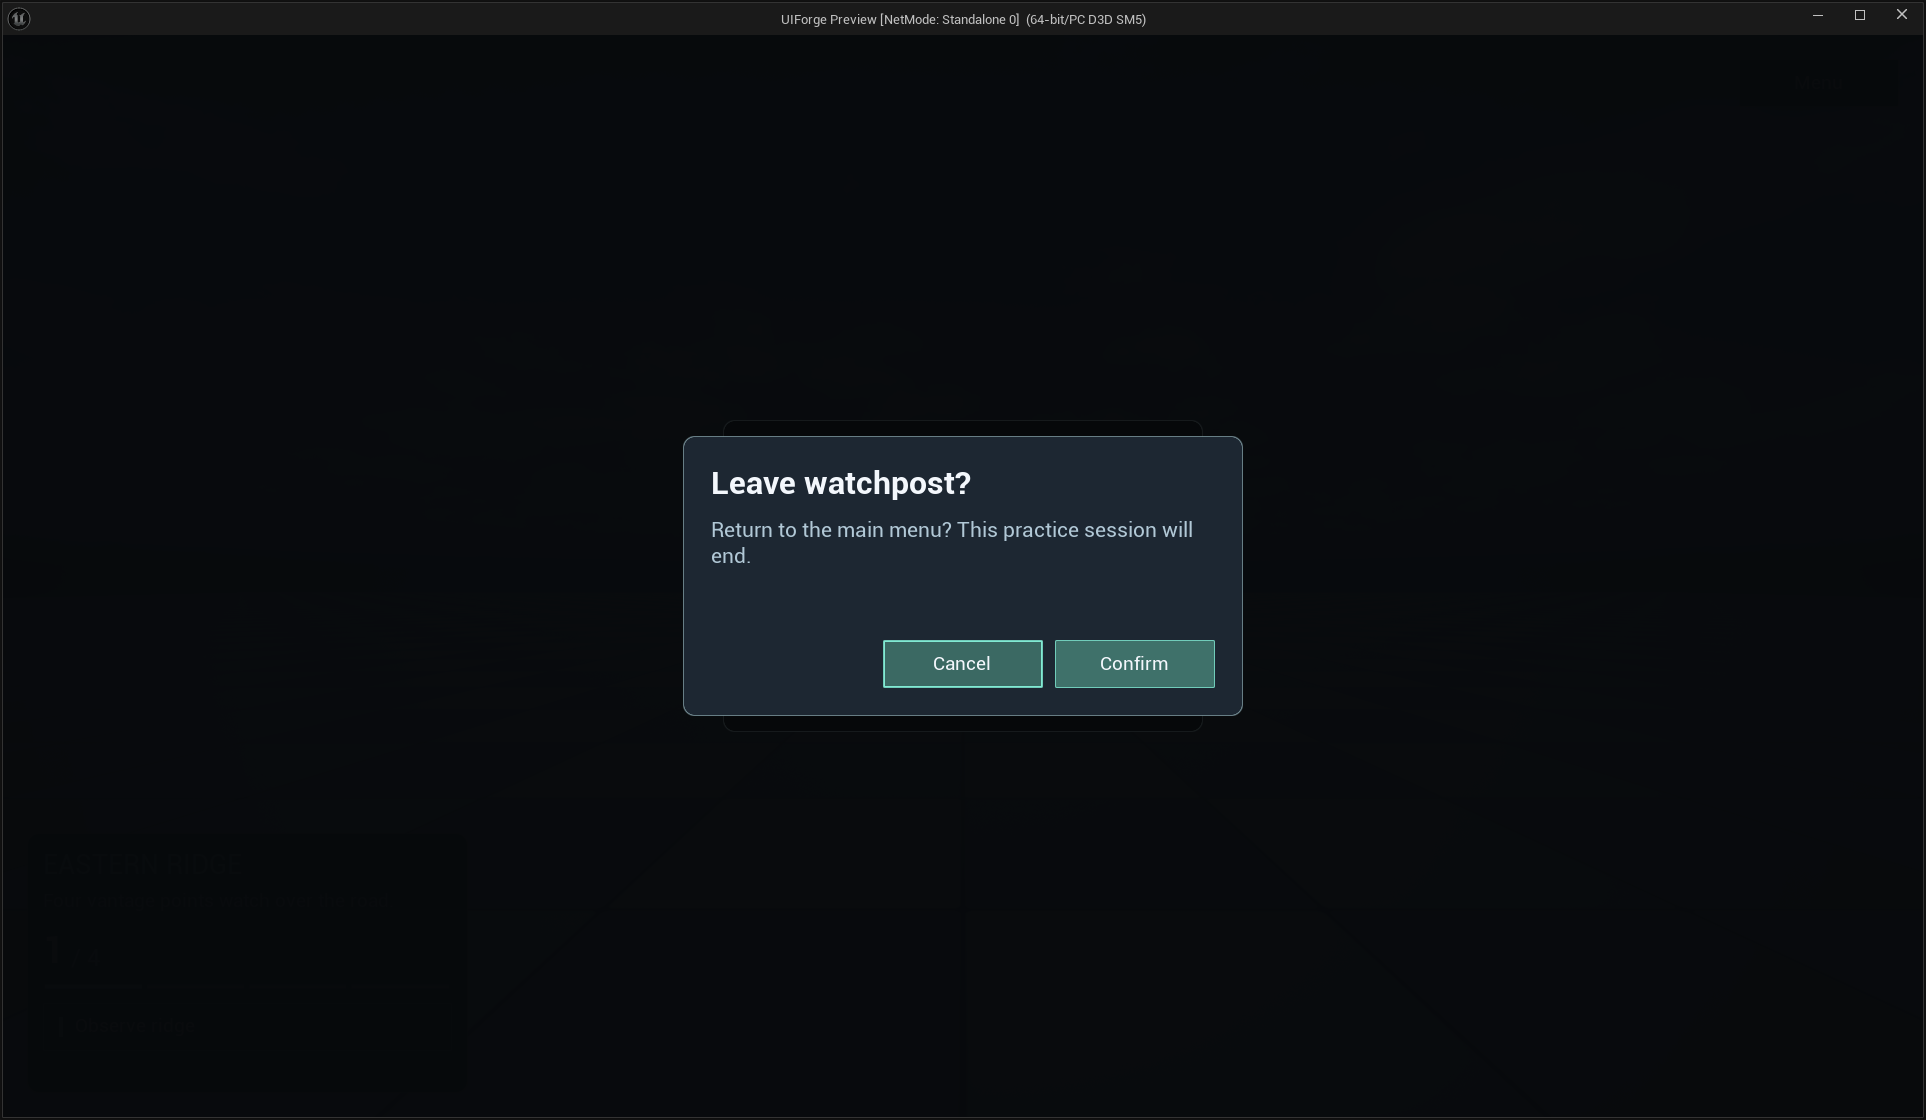
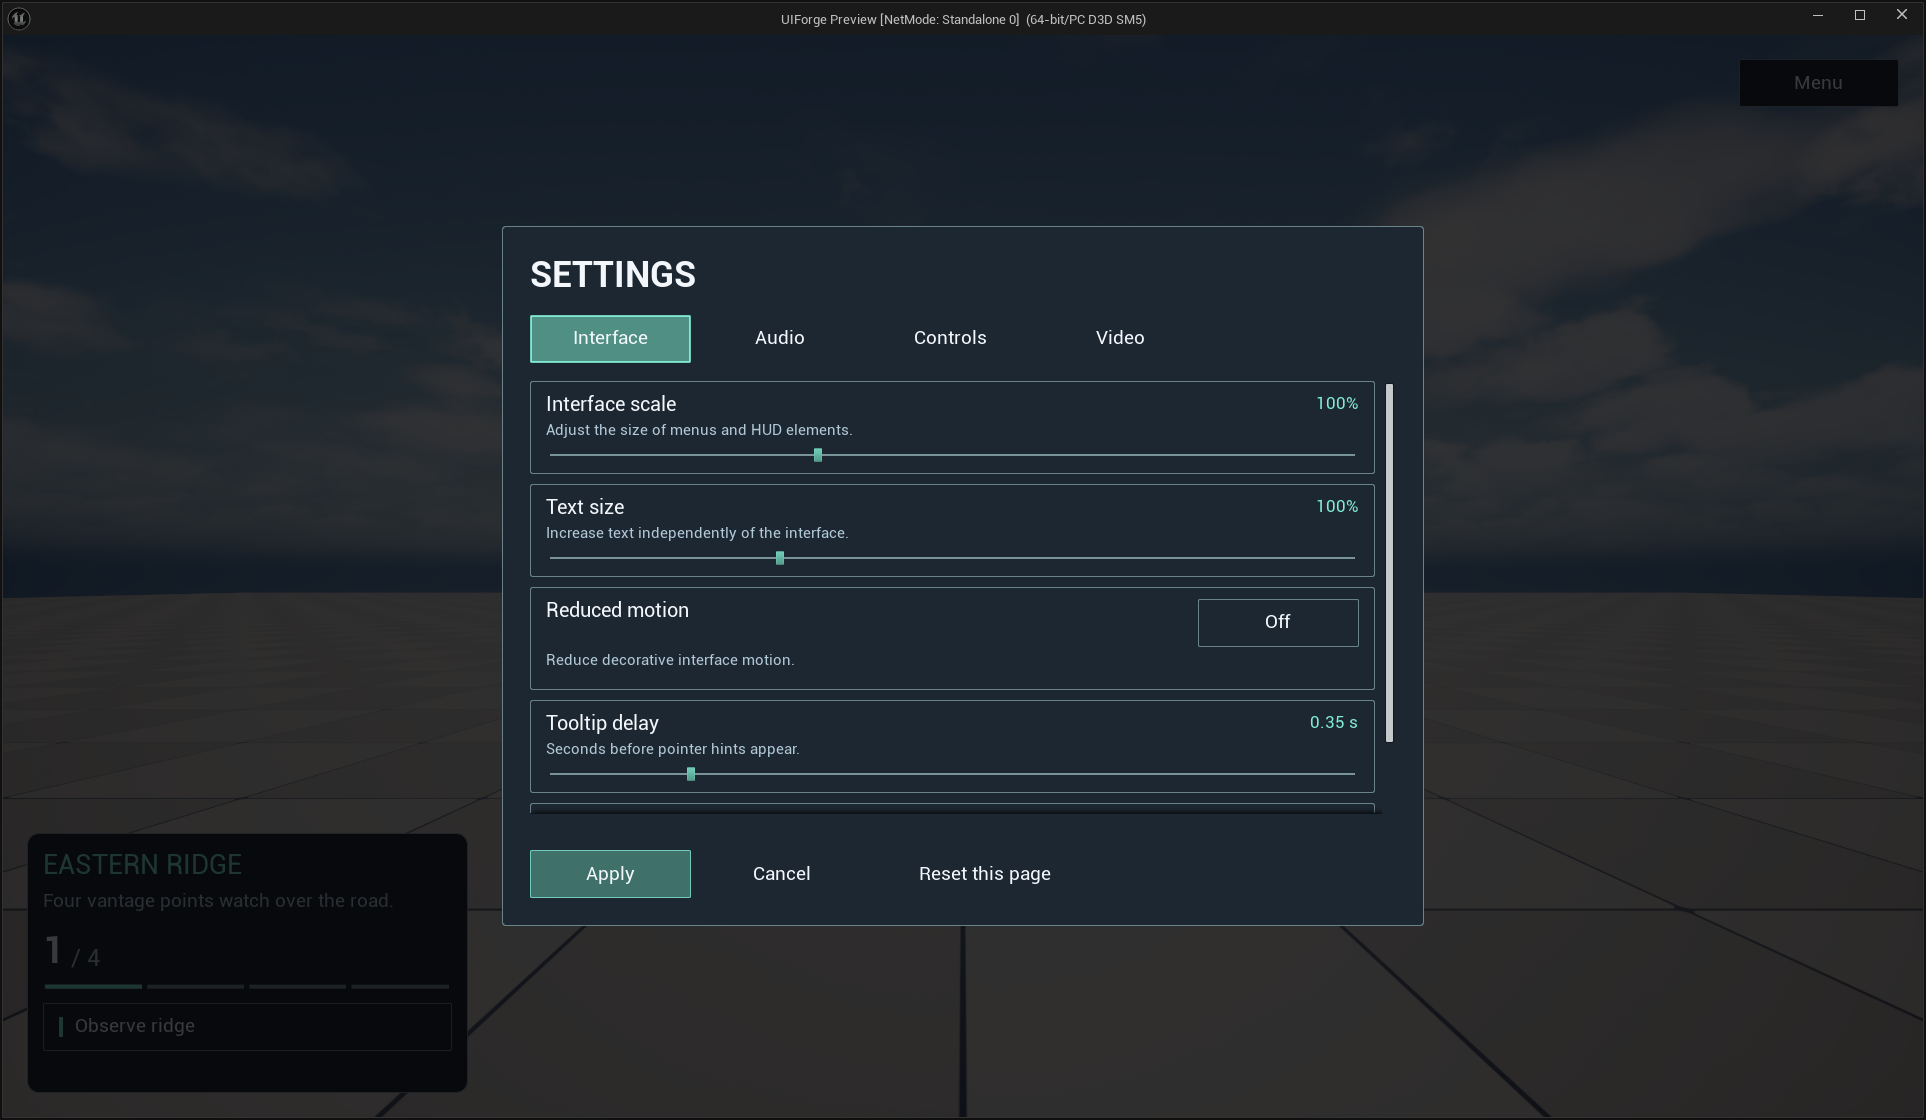
Open settings through Push Screen → Menu. Build it using the visual settings walkthrough, rather than a C++ class that constructs your game's whole menu. Dialogs use IFDialogData → Push Dialog and return a result; execute game actions only after handling that result.
9. Verify your integration
Play the learning map and follow main → HUD/custom entry → pause → settings → Cancel → return confirmation → main. Check that the entry responds, the screen stack restores focus, Cancel restores previews, and closing/reopening does not duplicate the root or its subscriptions.
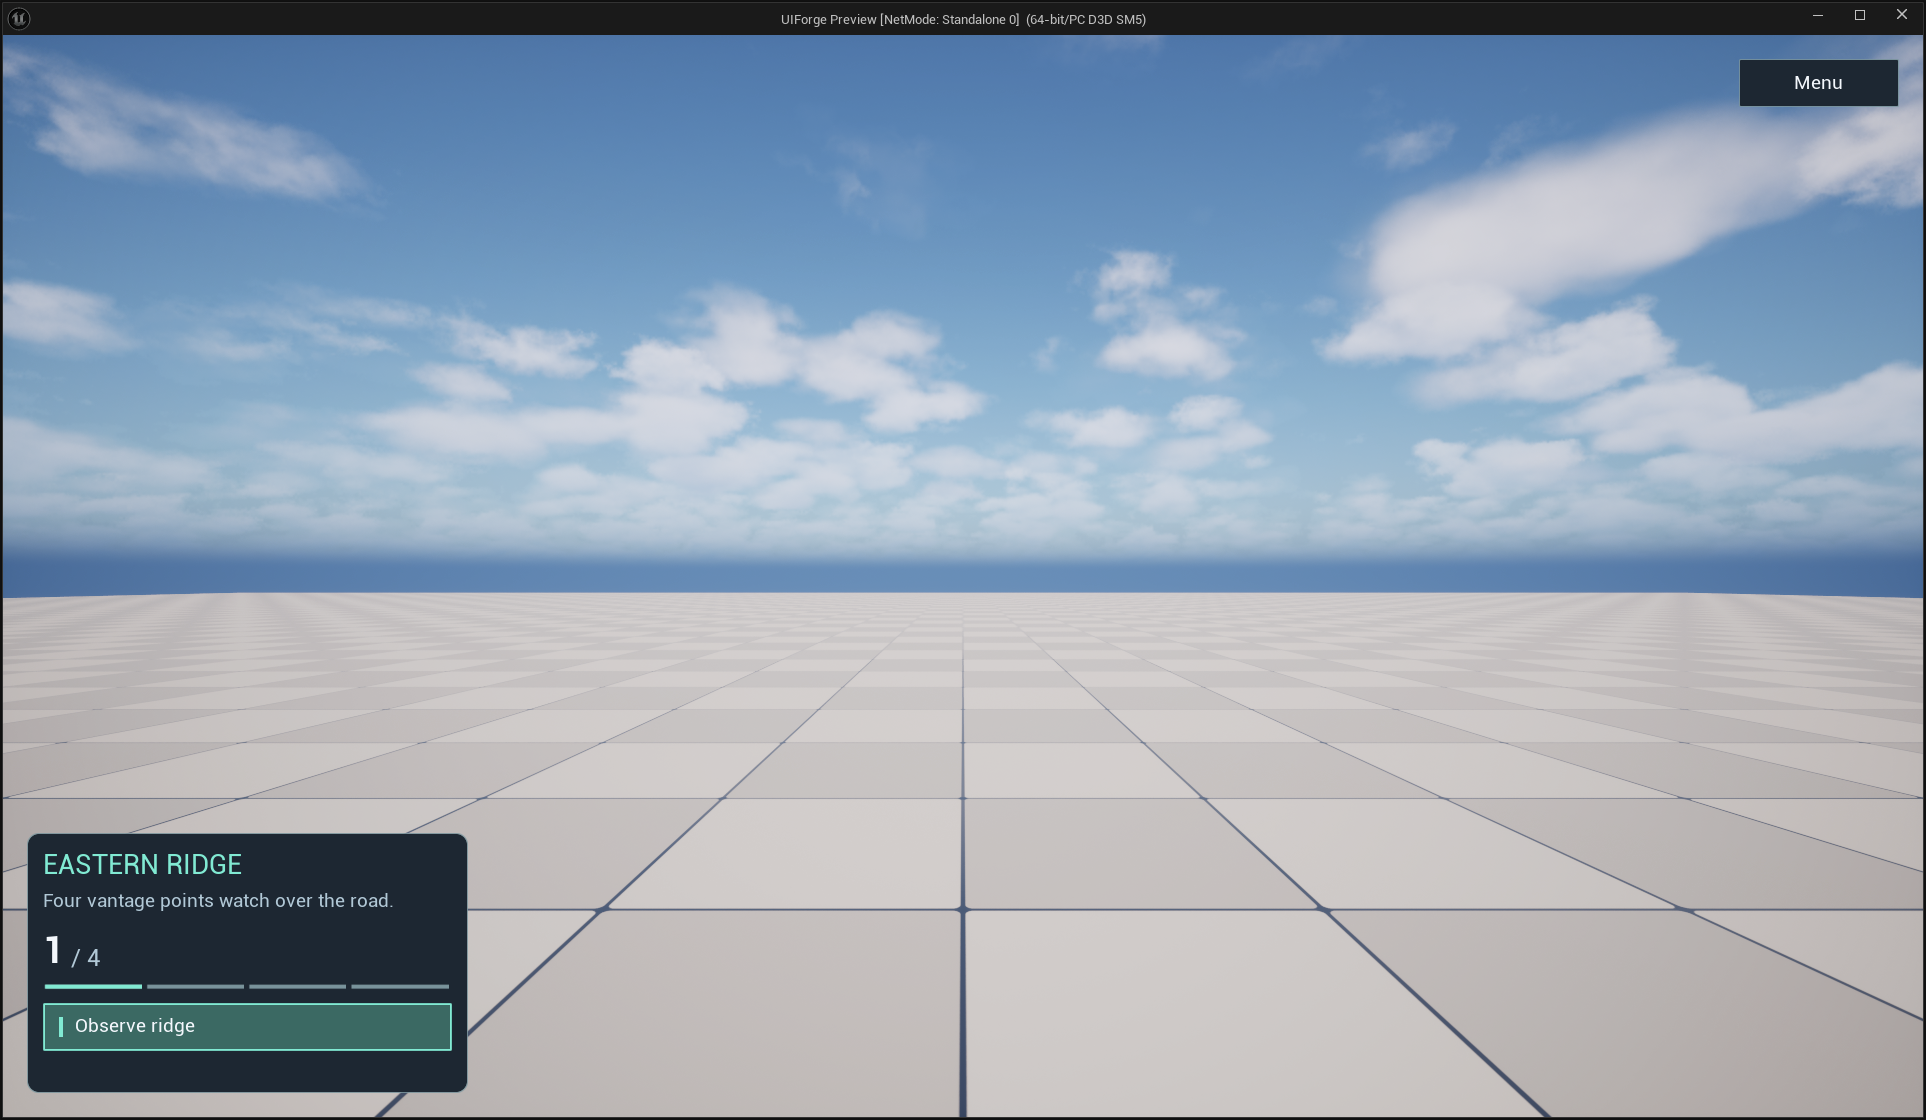
The visible count comes from the Blueprint source/model; the entry button requests the action and the model notification refreshes its presentation.
Then test your game's real data adapter, remapped prompts, supported resolutions and input devices. The fuller integration guide explains authority, travel, packaging references and troubleshooting. An attractive screenshot is not evidence that these runtime behaviors work in your project.