
Appearance
Implement UIForge in your game
Follow the illustrated integration route: exact locations, real Designer/graph images and expected results. This page supplies the detailed contract/reference.
This walkthrough builds a local-player interface in an ordinary Unreal project: main menu, a gameplay HUD with an observable Blueprint record, pause, a confirmation dialog, and the four-tab settings menu. The game keeps its own controller, pawn, rules and saves. UIForge supplies presentation, CommonUI layers, focus, styling and settings coordination. No inventory, MassForge or ForgeExamples runtime module is required.
Verified on UE 5.8.3 / Win64: the saved controller, game mode, screens, custom entry and settings run in a separately copied project with only InterfaceForge installed, without any ForgeExamples C++ module, MassForge or inventory. Native mouse input completed main → HUD/entry → pause → settings → confirmation → main. The custom opacity and an H keyboard remap survived restart. The playable MMO/RTS examples are separate, fuller demonstrations; this host is deliberately a small integration test, not another showcase or an MMO backend. Physical controller tests remain deferred.
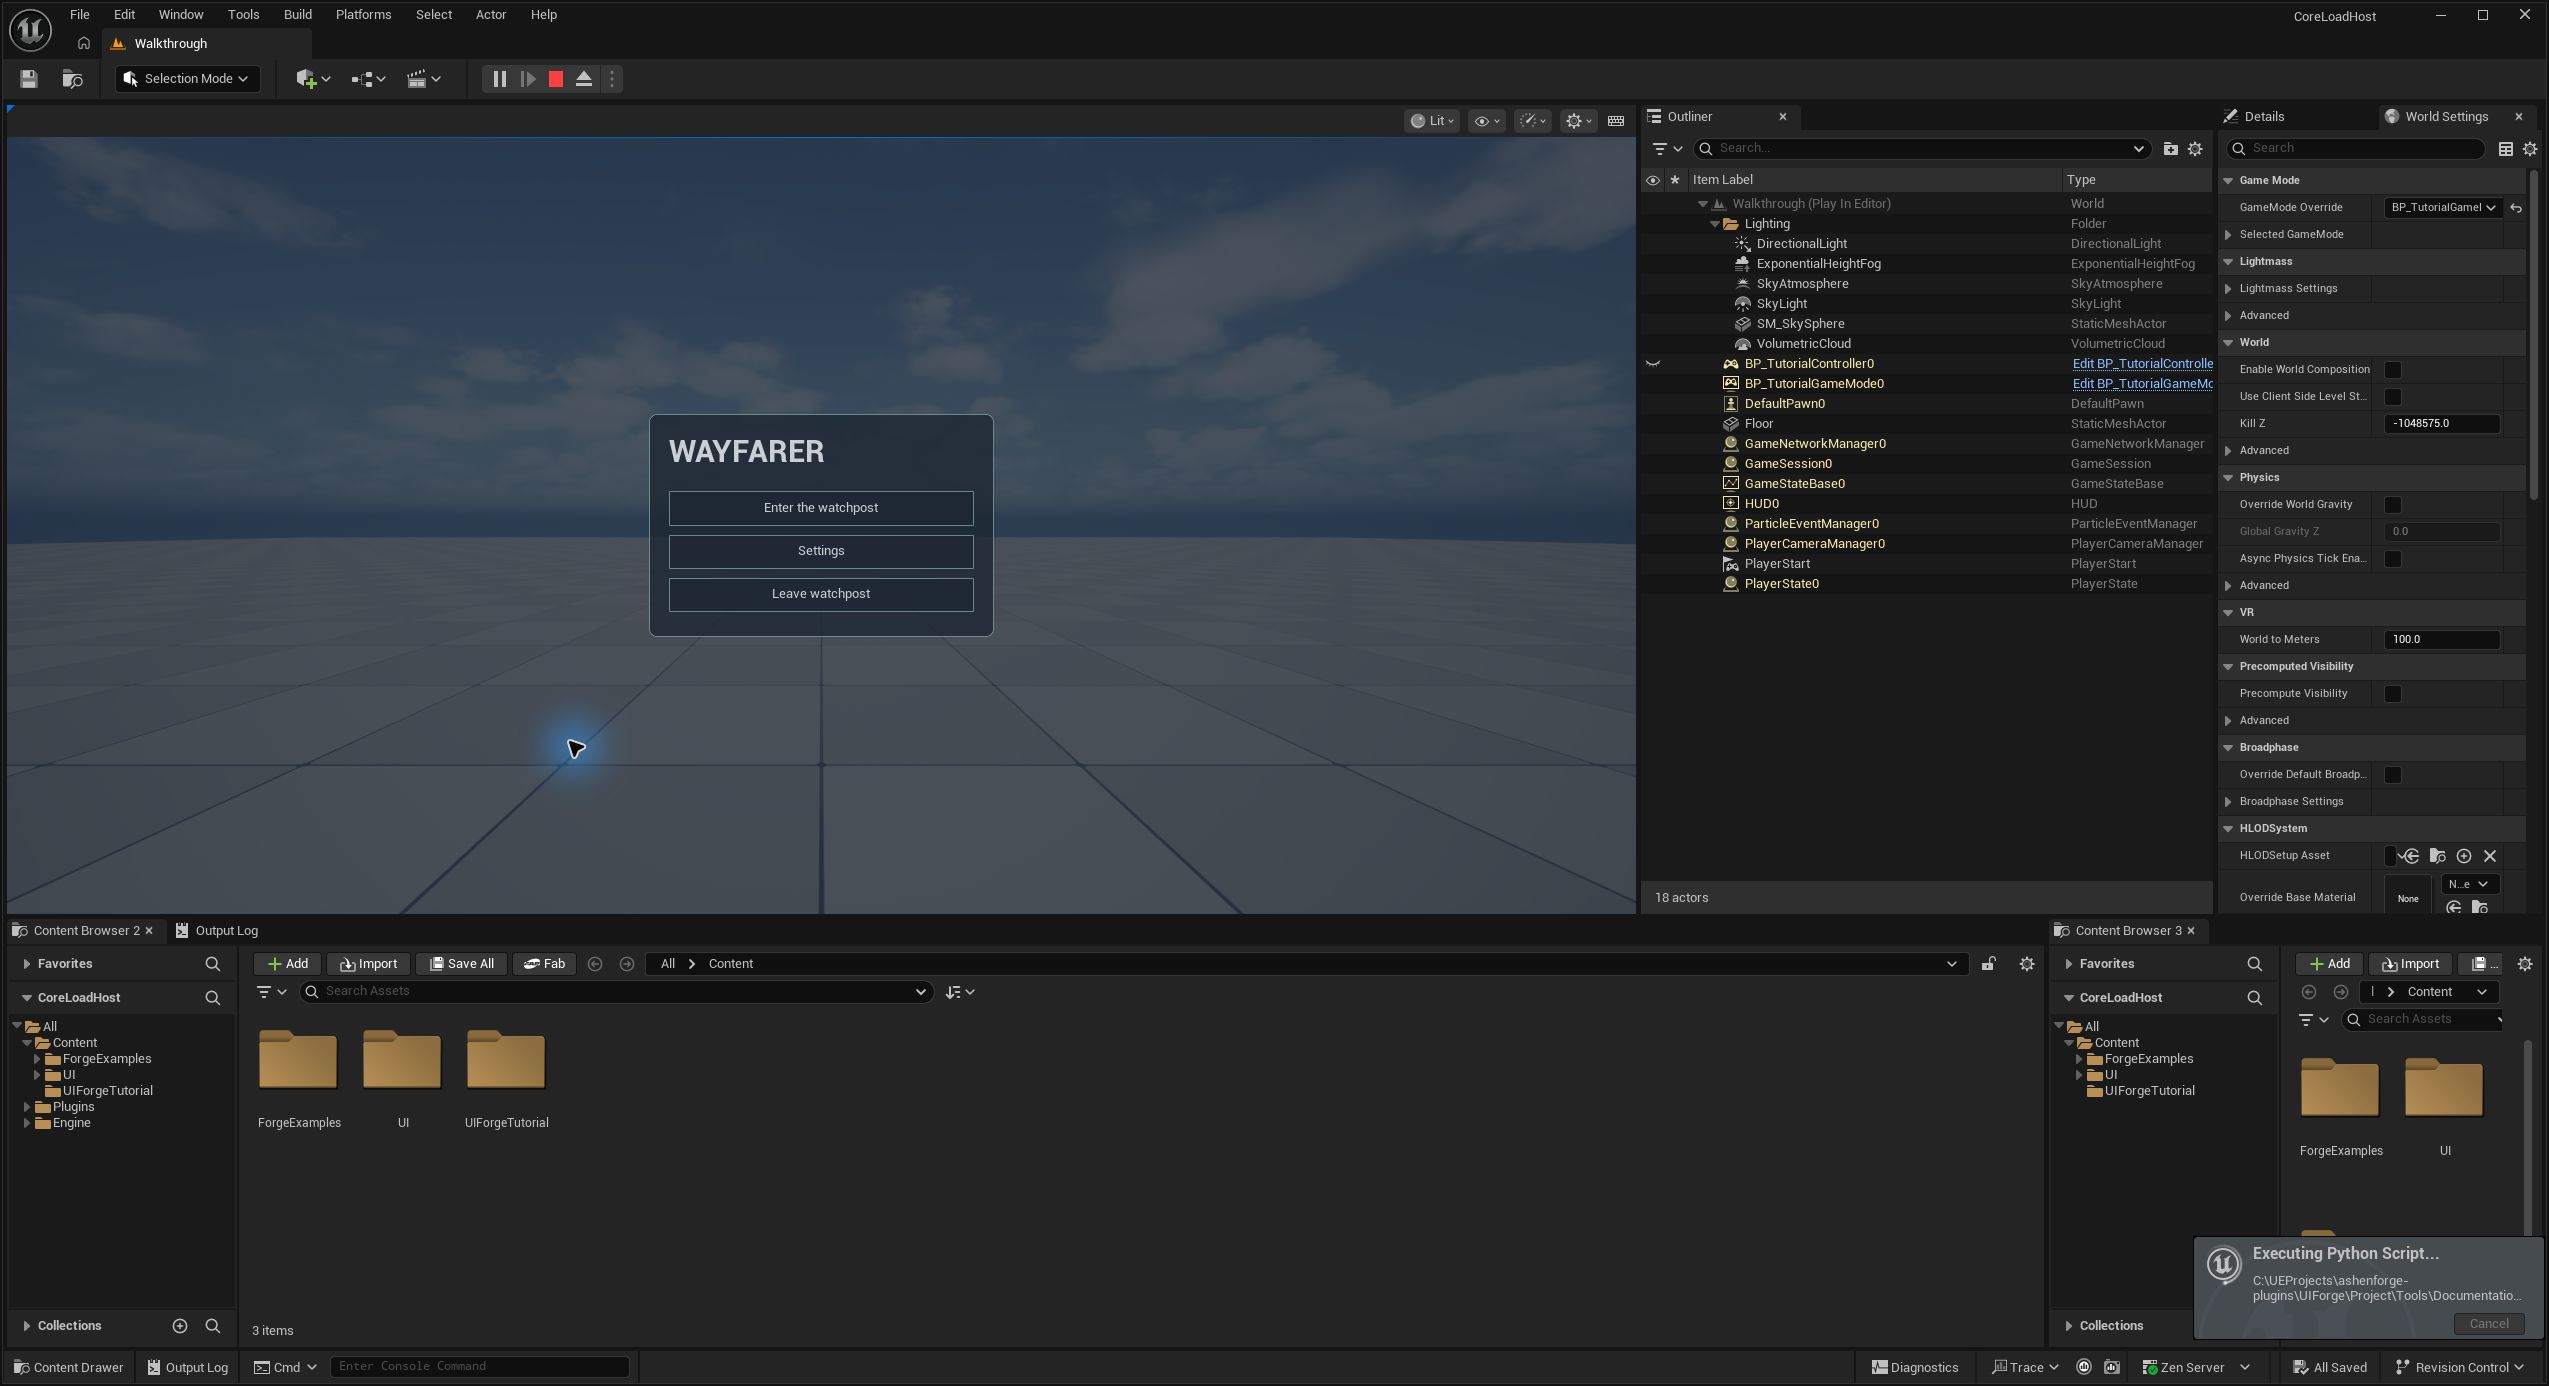
1. Install into an ordinary project
Use Unreal 5.8.3 CL58210709 on Win64 for the documented test target. The plugin descriptor's compatible version is 5.8.0, matching this installation's compatible-engine baseline. That field is not a claim that every 5.8 patch/platform was tested. Source installation requires the Windows C++ build tools even when the game's assets are Blueprint-only.
Close your game's editor. Put InterfaceForge under <YourGame>/Plugins/, with its .uplugin, Source, Config, Content and Resources. Exclude development Intermediate/Saved and stale binaries from another engine. Enable InterfaceForge, CommonUI and EnhancedInput, then rebuild/reopen. CommonInput is brought in by CommonUI. Optional adapter directories are not part of the core install.
For an existing game, keep its GameMode/PlayerController and add the local setup below to their existing Blueprint extension points. Do not replace a working possession, network or input system simply to add menus. For a clean project, create BP_TutorialController from PlayerController and BP_TutorialGameMode from GameModeBase; select that controller on the GameMode and assign the mode in your map's World Settings.
Expected result: the plugin's classes appear in the parent-class picker and the Content Browser can show /InterfaceForge/UIForge when Show Plugin Content is enabled. A missing plugin mount or skipped incompatible plugin is a setup failure, even if the game's native module links against InterfaceForge.
2. Configure CommonUI and input
Set these Project Settings before testing navigation:
| Setting | Value / reason |
|---|---|
| Engine → General Settings → Game Viewport Client Class | CommonGameViewportClient; gives CommonUI its normal input routing |
| Common Input Settings → Input Data | IFNavigationInputData, or a compatible project replacement; default Enter/Escape and controller Accept/Back |
| Common UI Settings → Common Button Accept Key Handling | Trigger Click; accepting a focused IFButton produces its click event |
| Enhanced Input → Enable User Settings | Enabled; registered player-mappable contexts populate remapping |
| Input default classes | EnhancedPlayerInput / EnhancedInputComponent when using Enhanced Input |
Choose your project's controller data through CommonInput platform settings. The included BP_IFGenericController and original geometric face glyphs are a generic example, not licensed console branding or proof of a specific device. Keyboard prompts resolve actual Enhanced Input mapping names rather than hard-coded display strings.
IFScreen's Contain Navigation defaults on for Menu-policy screens and modals. It stops unhandled directional/Tab navigation at the screen boundary; child explicit/wrap rules still work. Disable it only when deliberately sharing a focus region. This prevents a dialog-edge direction from selecting a covered menu button.
In your local controller's Event BeginPlay, branch on Is Local Controller. From Self, use Get Enhanced Input Local Player Subsystem. Get Enhanced Input User Settings supplies the settings object; check it is valid before calling registration. Call Register Input Mapping Context on the returned user-settings object, with your player-mappable context on IMC. Call Add Mapping Context on the Enhanced Input subsystem with the same asset and your chosen Priority. Registration makes rows available for settings; adding the context enables actual gameplay input. Do not register a parallel list of imaginary keys.
Existing games should register their own context once, preserve existing priorities and avoid Clear All Mappings. Keep a hard reference to the context from your controller or another cooked asset. A context loaded only by an untracked string can work in the editor and be missing from a package.
3. Create the local root
In the local BeginPlay branch, use Get IFLocalPlayerSubsystem from Self. Call Set Theme with your IFTheme data asset, then Create Root with Root Class IFRootLayout or your root Widget Blueprint. Retain the subsystem or use Get Root when needed; do not create an extra root for each menu.
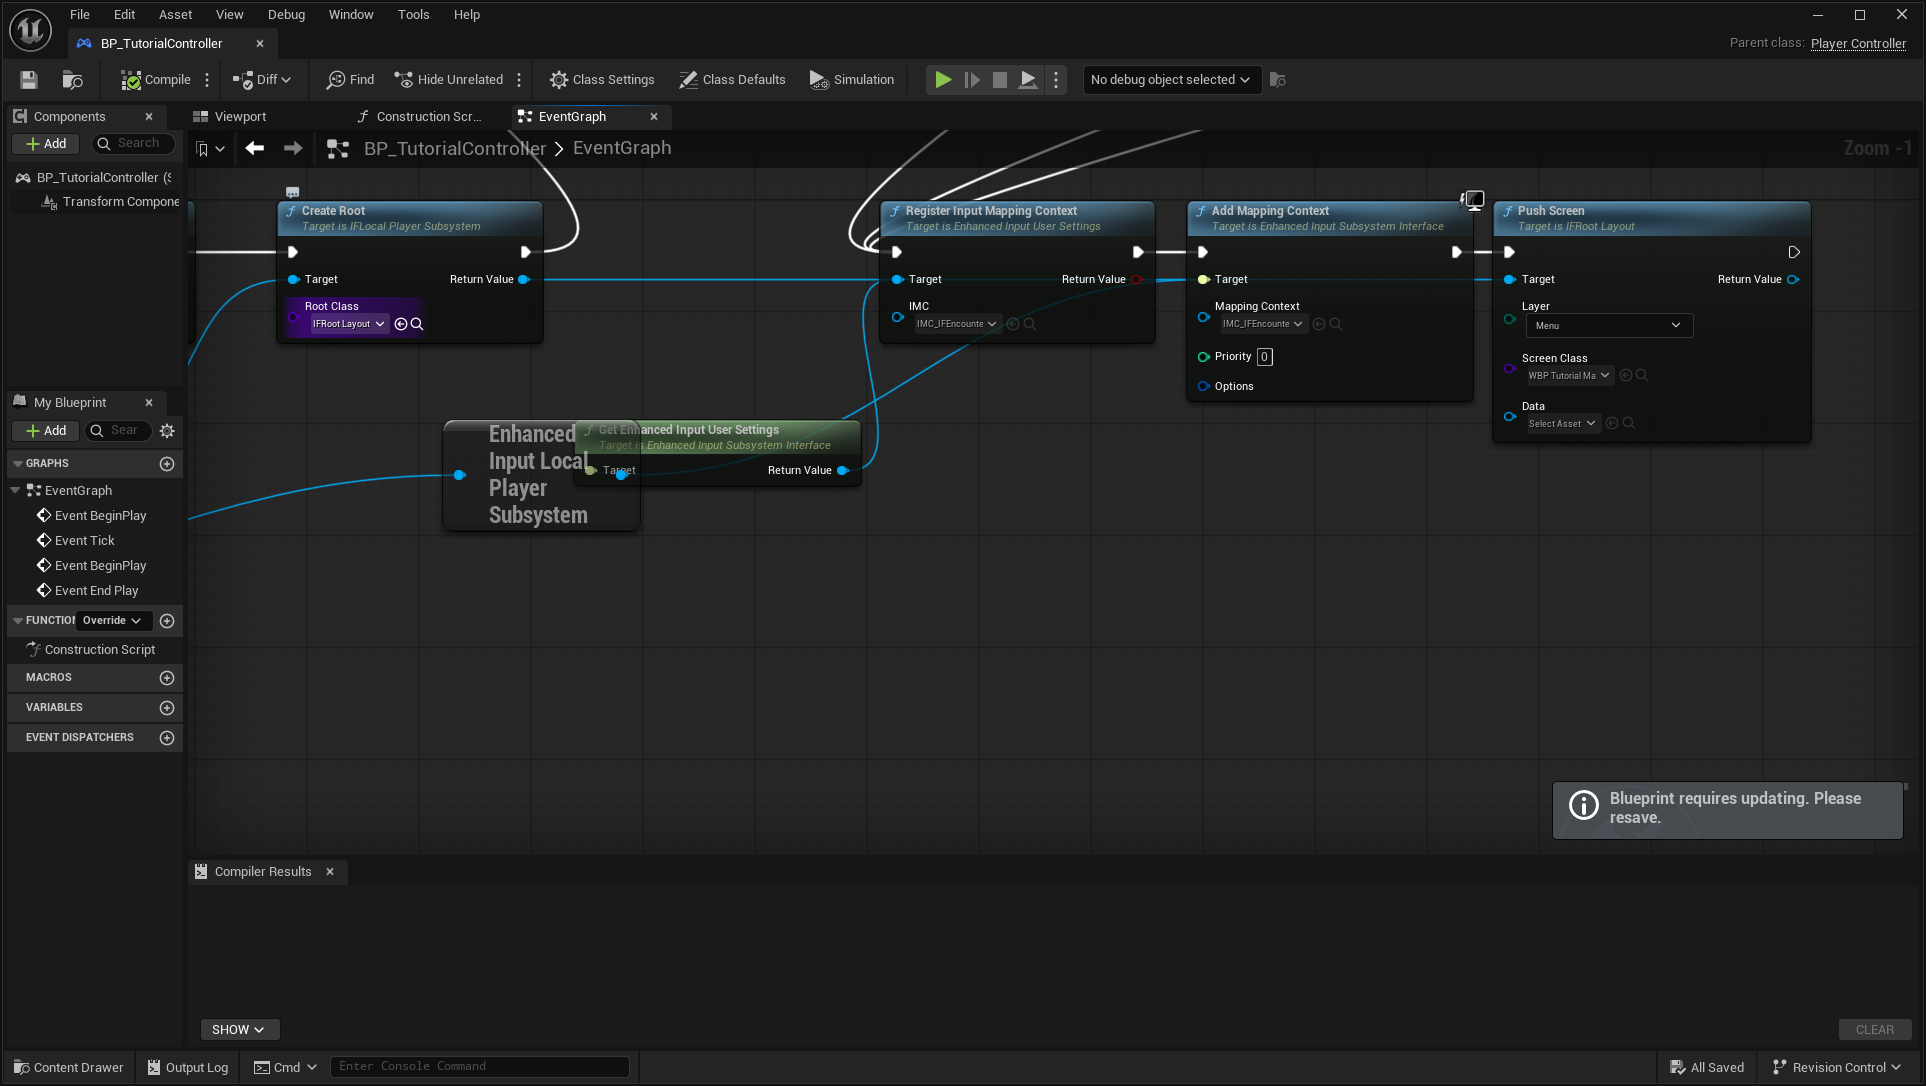
flowchart LR
  A[Event BeginPlay] --> B{Is Local Controller}
  B -->|true| C[Get IFLocalPlayerSubsystem from Self]
  C --> D[Set Theme]
  D --> E[Create Root: IFRootLayout]
  E --> F[Push Screen: Menu / WBP_TutorialMain]
Push Screen Target is the returned root; Layer is Menu; Screen Class is your saved IFScreen Widget Blueprint; Data is your presentation adapter or None. The root creates HUD, Menu and Modal stacks by default and includes a Safe Zone. A Designer-built root can instead register its own Common Activatable Widget Stacks through Register Layer. Keep the layers' visual/input order consistent.
In Event EndPlay, call Remove Root on the local-player subsystem before abandoning this controller. Before Open Level, remove the old root and let the next local controller initialize its own. Do not carry stale widgets, world actors or old data subscriptions through travel. For server-only controllers there should be no local UI setup.
Expected result: one root per local player, one visible menu, and keyboard Accept/Back handled by CommonUI. Avoid calling engine Set Input Mode every tick; IFScreen's Input Policy supplies CommonUI's desired mode.
4. Design the main menu
Create WBP_TutorialMain, parent IFScreen. In Designer, use a full-screen Canvas/Overlay, a scrim, a Scale Box set Scale To Fit / Down Only, a bounded Size Box, IFSurface and a Vertical Box. Use IFText for the title and IFButton-derived widgets for the actions. Keep ordinary navigation targets about 48 logical units high; tune typography and padding against real viewport sizes instead of enlarging the whole tree.
Set Input Policy = Menu, Initial Focus Name = PlayChoice, Fallback Focus Name = SettingsChoice, and Show Pointer Cursor = true. Names are Designer variable names; nested focus targets can use a path such as HUDLayout/Pause.
For each IFButton, select On Button Base Clicked in the graph. SettingsChoice calls Get Root Layout → Push Screen, Layer Menu, Screen Class your IFSettingsMenu Blueprint. It does not call Create Widget/Add to Viewport directly. For PlayChoice, construct your own data-source object, push the HUD on the HUD layer with that object on Data, then Deactivate Widget on the main menu. Own the adapter in an appropriate controller/game instance variable if it must survive screen replacement; a screen's Data reference also retains it for that screen's lifetime.
Keep instructional feature descriptions in the developer guide. The menu should look and behave like a game's entry point. Continue/Load should only be enabled when your game's save system reports a valid save; UIForge does not invent a gameplay save format.
5. Connect a gameplay HUD through an adapter
Create a Blueprint implementing IFDataSource, using your existing actor, component or UObject. Implement:
- Get UIModel(Model Name): return a stable UObject for that named display, or None. Do not allocate a new object for each query.
- Request UIAction(Action Name, Context): validate the requested action in the game and return whether it was accepted. UI widgets cannot grant authority to a client.
Use IFPresentationData for common Title, Detail, Fraction, Quantity and Enabled fields, or your own observable type. When gameplay changes, update the model and call Notify Data Changed. Make health/resource models reflect actual game events; do not scan the world from each widget Tick.
The independent tutorial reuses the saved BP_WatchpostSource as a small Blueprint adapter. Its Record action validates Context and a four-observation limit, changes Quantity/Fraction/Detail, then notifies. Replace this with your health/objective/interaction system by changing the adapter, not by rewriting the entry lifecycle.
Create WBP_TutorialHUD, parent IFScreen, Input Policy = Game And UI. Place an IFHUDLayout inside your project's Safe Zone and assign an IFHUDLayoutProfile with named regions. Call Set Region Widget(Region, Widget) for your developer-created widgets; check its Boolean for a missing region. Regions control anchors, size, offsets and optional compact behavior. Alternatively use ordinary UMG anchors for a small fixed arrangement. Avoid applying an extra manual DPI factor: the project's DPI curve and UIForge's UI scale already compose.
HUD Event Initialize Screen must first execute Parent: Initialize Screen, forwarding Data. Then Get UIModel, Model Name Record, supplies Initialize Entry on your entry variable. Accessing Screen Data before the parent call is a common initialization error.
6. Create your custom reusable entry
Create a Widget Blueprint with parent IFEntryWidget. Design its own IFSurface, IFText fields, progress and optional IFButton. The entry is not a special game-specific C++ subclass.
| Event / node | Blueprint work |
|---|---|
| On Entry Initialized | Optional one-time work for the newly assigned Data |
| On Entry Refreshed | Entry Data → Cast to IFPresentationData → set text, fraction, quantity, availability |
| On Entry Selection Changed | Change a semantic text role/outline and Refresh Appearance |
| On Entry Released | Clear visible transient state and release your own additional subscriptions |
| Entry button click | Find Parent Widget Of Type(IFScreen), execute it, Cast to IFScreen → Request UIAction(Action Name, Entry Data) |
The base subscribes to IFPresentationData change notifications and removes the old subscription on reassignment/release. For other model types, bind your own event and unbind that exact object during release. Do not subscribe to the entire entity population. The engine's List View/Tile View owns pooling and virtualization; assign your entry class, then Add Item or Set List Items with the models. Selection is model-based; do not retain pooled visual rows as gameplay identity.
The saved WBP_WatchpostEntry demonstrates this lifecycle and a project-authored segmented record control. A different entry can be assigned to a List View or region without changing the adapter contract. Entry recipe and customization show the real event graphs.
7. Pause, dialogs and return
Create WBP_TutorialPause, parent IFScreen, Input Policy Menu, initial focus Resume. A HUD Menu button uses Get Root Layout → Push Screen(Menu, WBP_TutorialPause, Data). Override HUD On Handle Back Action to push that same menu and return true, so Escape/controller Back opens pause rather than destroying the HUD. Pause's Resume calls Request Back. CommonUI restores the underlying screen's navigation target.
For an actual single-player pause, have your game's controller/adapter call Set Game Paused(true) when opening pause, and restore false on Resume/return/travel. Keep UI input able to execute while paused. Do not pause a network server merely because one client's local menu opened. The tutorial's saved Blueprint HUD and pause screen use these game-owned nodes; stack activation by itself does not pause the world.
Confirmation: Construct Object from Class(IFDialogData) with a retained owning UObject as Outer. Set Title, Message, Confirm Label and Cancel Label. Bind Event to On Completed before calling Get Root Layout → Push Dialog(Data). In the handler, branch on Result Confirmed before acting. Cancelled must retain the current game. The modal defaults focus to Cancel, reports exactly once, consumes Back and keeps input out of underlying screens. Replace Default Dialog Class on your root with an IFDialog Blueprint to change the whole visual.
For Return to Main Menu, the confirmed game adapter removes the root, unpauses if appropriate, then opens your menu level. For an in-world menu, clear HUD/Menu layers and push the menu again. For Exit, call your platform's normal Quit Game path only after confirmation. UIForge does not save progress automatically when a dialog closes.
8. Build the four-tab settings menu
Follow Build a settings menu in Blueprint. Create an IFSettingsMenu Widget Blueprint with SettingsPages (Widget Switcher), Page Ids in matching order, IFSettingsTabButton headers with Page Index, reusable IFSettingRow widgets with Definition, and ApplyChoice / CancelChoice / DefaultsChoice / SettingsStatus. These optional variable names attach behavior to your Designer tree; the native class does not build the menu layout.
Use Interface, Audio, Controls and Video pages. Set Include Input Bindings for IFBindingEntry rows tied to your registered mapping names. The same footer owns preference and binding drafts across tabs. Back/Cancel reverts preview and discards keys; Reset this page changes only that category's draft; Apply commits and returns only on success. Failures remain on screen. Do not embed a standalone IFRemappingScreen that commits separately.
For a project-specific setting, create IFSettingDefinition with Custom binding and a Blueprint IFSettingProvider. Implement Read Value, Validate Value, Preview Value, Commit Value, Restore Value. The saved BP_IFOpacityProvider demonstrates a real SaveGame and root opacity preview/rollback. Create the provider after your root at startup and Read/Validate/Preview its saved value to apply it outside the settings menu. Use the owning Player pin and stable Setting Id; never change another local player's root.
Create IFAudioRouting with a SoundMix and distinct sibling UI/game SoundClasses, and call Set Audio Routing on IFSettingsSubsystem during setup. Assign theme feedback sounds to the UI class and gameplay sounds to the game class. Test each volume independently, including mute and Cancel. For UI preferences choose Set Storage Profile before opening an edit session, not during editing.
Video rows use Unreal GameUserSettings. Current builtin rows cover VSync, frame limit, normalized resolution scale and scalability quality. They deliberately do not change display resolution/window mode. If your game adds those, use Apply Resolution Settings plus a timed Keep/Revert dialog and engine Confirm Video Mode / Revert Video Mode; never save an unconfirmed mode just because a slider changed. SaveGame, input profiles and engine config are separate writes; this workflow does not advertise an atomic multi-file transaction.
9. Style, motion and progress
Create an IFTheme data asset or duplicate an included theme. Assign fonts, typography, palette, spacing, focus/confirm sounds, transition duration and button feedback. Set Theme updates the local-player interface; IFText/IFSurface/IFButton and setting controls follow it. Setting rows can disable Follow Theme Colors to retain Designer styles. Use localized FText labels/help, allow prose to wrap, keep numbers/key labels unwrapped, and test the longest supported language.
Use Widget Blueprint animations for project transitions and On Input Presentation Updated for layout-specific presentation. Honor Reduced Motion and expose feedback strength as game settings when adding camera effects. Do not add an independent camera-shake system merely to populate a UI example.
Progress is presentation data, not an ability backend. IFCenterTint reproduces the inspected Sakura center-origin interior tint; overlay it on your icon and drive Set Remaining Fraction. Fraction 1 covers the interior, 0 uses passed opacity throughout. Tint, Remaining Opacity, Passed Opacity, Start Angle and Reverse are editable; Refresh Tint applies property overrides to that image's material instance. Do not substitute an assumed square-perimeter ring. Actual material controls document its parameters. IFProgressWidget supplies other linear/radial/square/segmented/charges presentations through Configure Progress, Set Fraction and the documented cooldown controls.
10. Verify input changes in the actual flow
Use the common input-presentation service throughout menu, HUD, popup and custom widgets. IFScreen owns cursor/input policy and top-screen focus; do not give every row an independent device detector. IFActionPrompt resolves its Mapping Name against applied Enhanced Input mappings and CommonInput controller data. On Input Presentation Updated can hide pointer-only decoration or show controller hints; it is not a place to rebind gameplay input.
Test keyboard/mouse → controller → keyboard/mouse on main menu, settings with a key selector, HUD, an open modal, and immediately after transitions. Check restored focus, Back, prompts, cursor, reserved/conflicting keys, insignificant mouse movement, analog drift thresholds and disconnect fallback. Software events can verify routing logic; they cannot verify a physical controller, touch digitizer, console or mobile platform. Physical-controller verification is explicitly deferred because no controller is available.
Unreal's default Escape → Stop Play editor shortcut can end PIE before the game's Back action receives the key. That happened in the independent host. Test the actual game Back behavior in standalone/packaged play, or deliberately adjust the editor's Stop shortcut for your own testing. Do not change the player's runtime Back mapping to work around an editor command.
11. Cook and test independently
Keep your maps referenced through packaging settings; retain hard/cook references to root/screens, contexts, themes, row classes and custom providers. A project-owned Primary Asset Label can include soft UI classes; its Asset Manager scan rules must include the label. Do not cook the entire development repository to conceal missing references.
Build the game, open a fresh process and verify main menu → settings → HUD → pause → return. Apply a scale and key, restart, and confirm the actual effects and prompt. Cancel a second edit and confirm the committed values remain. Run the same saved Blueprint row/provider in the independent host with no ForgeExamples/MassForge/inventory module. Test failure feedback using an isolated test save profile; never obstruct the player's real save slot.
Capture real Designer, readable graph and runtime images as evidence. Compilation proves types/graphs, not navigation or visual quality. At 1280×720, 1920×1080 and a narrow viewport, inspect text, focus rings, clipping, dropdowns, transitions and tooltip edges at normal and enlarged UI/text scale. Inspect the cooked build as well as PIE.
Troubleshooting
- Blank screen: ensure the local BeginPlay branch ran, Create Root succeeded, Screen Class is cooked and Push Screen uses the returned root. Check skipped-plugin/missing-package errors first.
- No focused button: Initial Focus Name must resolve to a visible enabled target on the active screen. Check CommonGameViewportClient and Trigger Click.
- Bindings unavailable: enable Enhanced Input user settings, execute Get Enhanced Input User Settings, register the player-mappable context and use its exact Mapping Name.
- Entry never updates: keep a stable model, initialize after Parent Initialize Screen, and call Notify Data Changed after mutation. Do not bind a temporary snapshot.
- Cancel leaves a change: route controls through the shared session; a custom provider must undo its own preview and partial commit. Avoid separate child Apply handlers.
- World/HUD input leaks through a dialog: push the dialog on Modal with Menu policy; do not Add to Viewport an unregistered widget beside the stacks.
- Packaged prompt/action missing: verify cooked references to the context and controller data, then test the applied mapping in a fresh process.
Keep the settings composition, current product status and verification pages alongside this guide for version-specific tested scope.
Character presentation in the separate MMO/RTS game is covered in Example character animation, including the editable Animation Blueprint and action contact markers. Your game can keep its own character animation system.